CADlink Digital Factory 10 gives the user a ton of options to allow them to customize their CADlink to work best for their needs. Today, we will show you how you can create a Left Chest Page Layout. This layout will automatically place your imported image to the correct spot of the left chest each time. Having this Page Layout will allow jobs to get completed faster and allow for consistency with each print.
Below is a step-by-step approach on how to get this completed.

First thing we need to do is create a new Media.
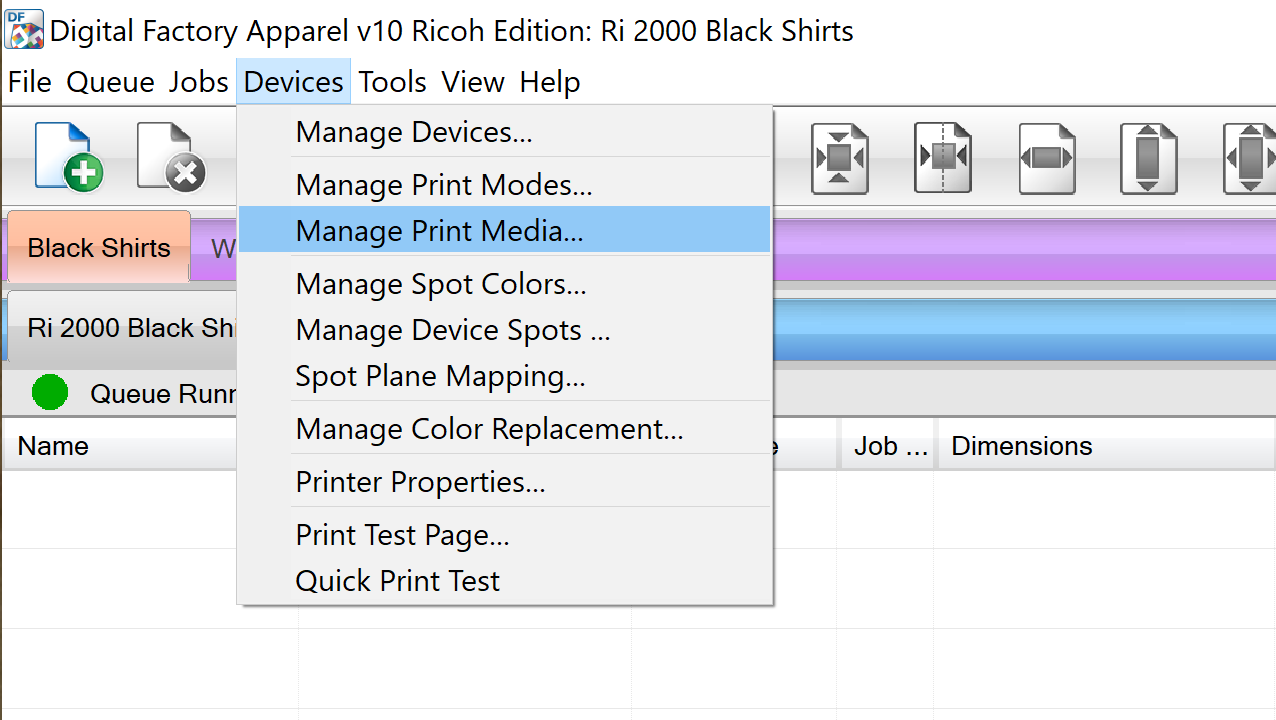
Click on Devices > Manage Print Media…
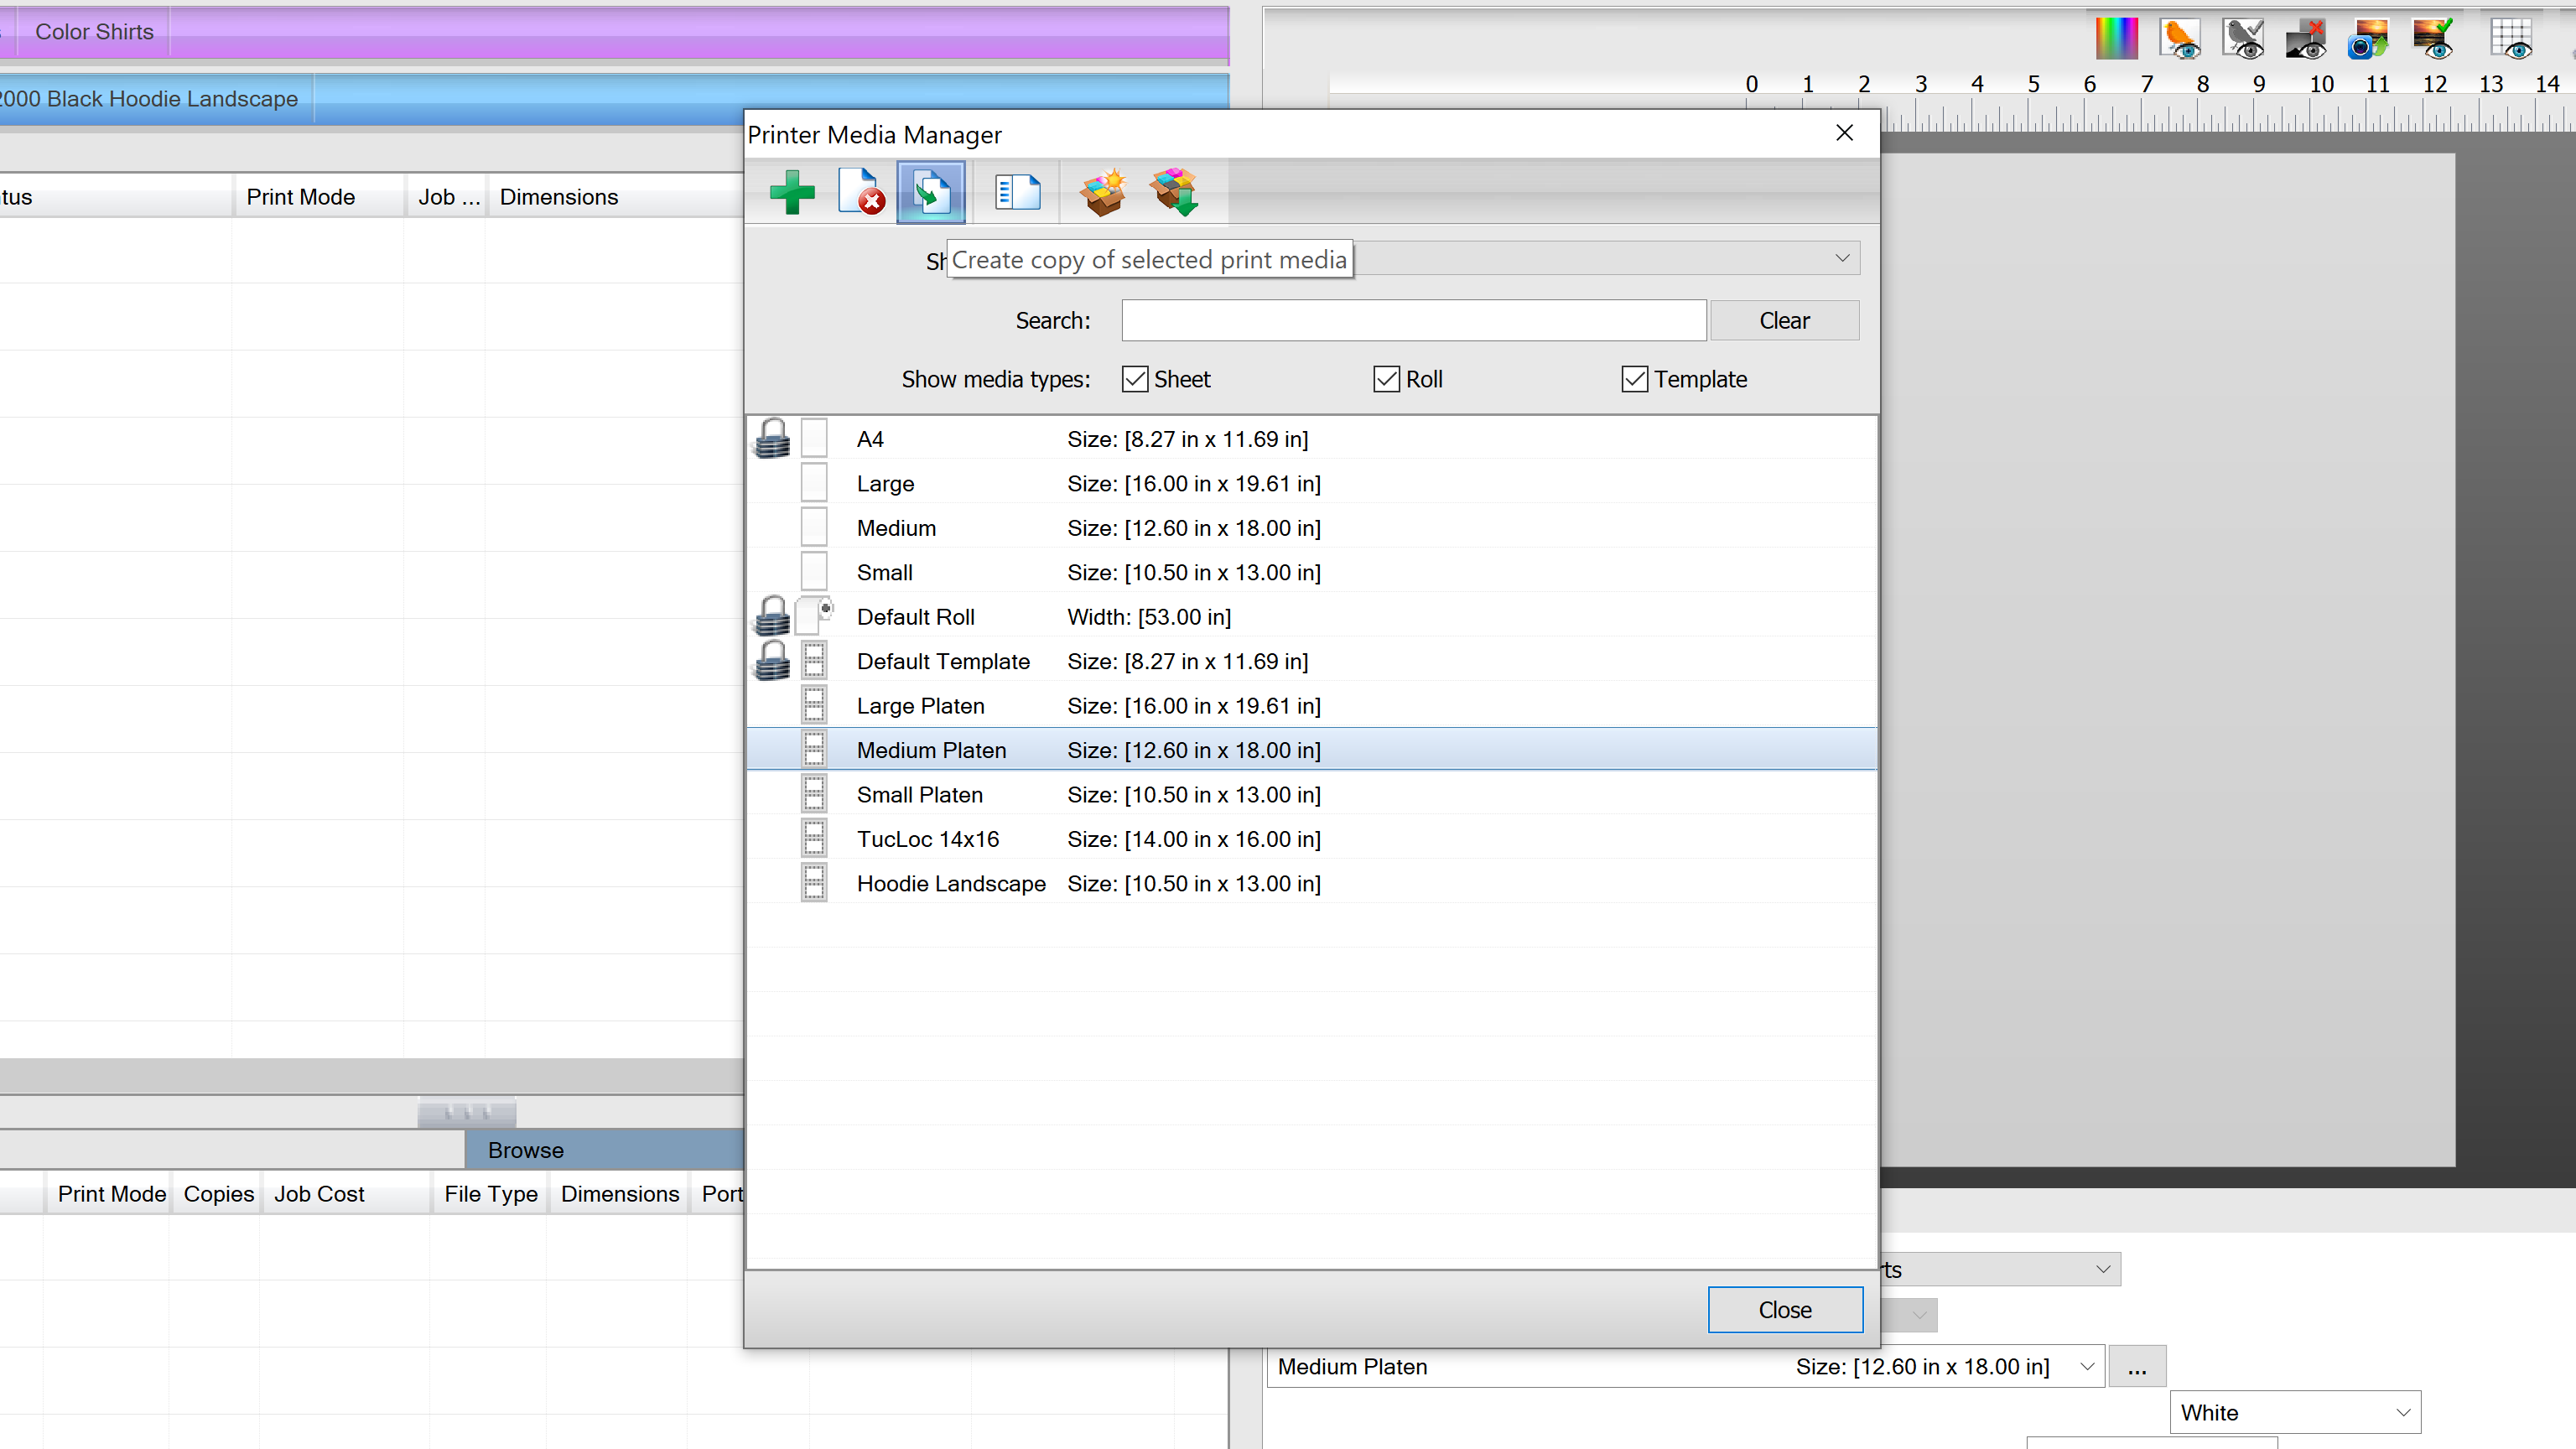
Because we are making this Left Chest page layout to be on a medium platen, we will do the following:
Click on Medium Platen once to highlight it. Then, click on the “Create copy of selected print media” icon.
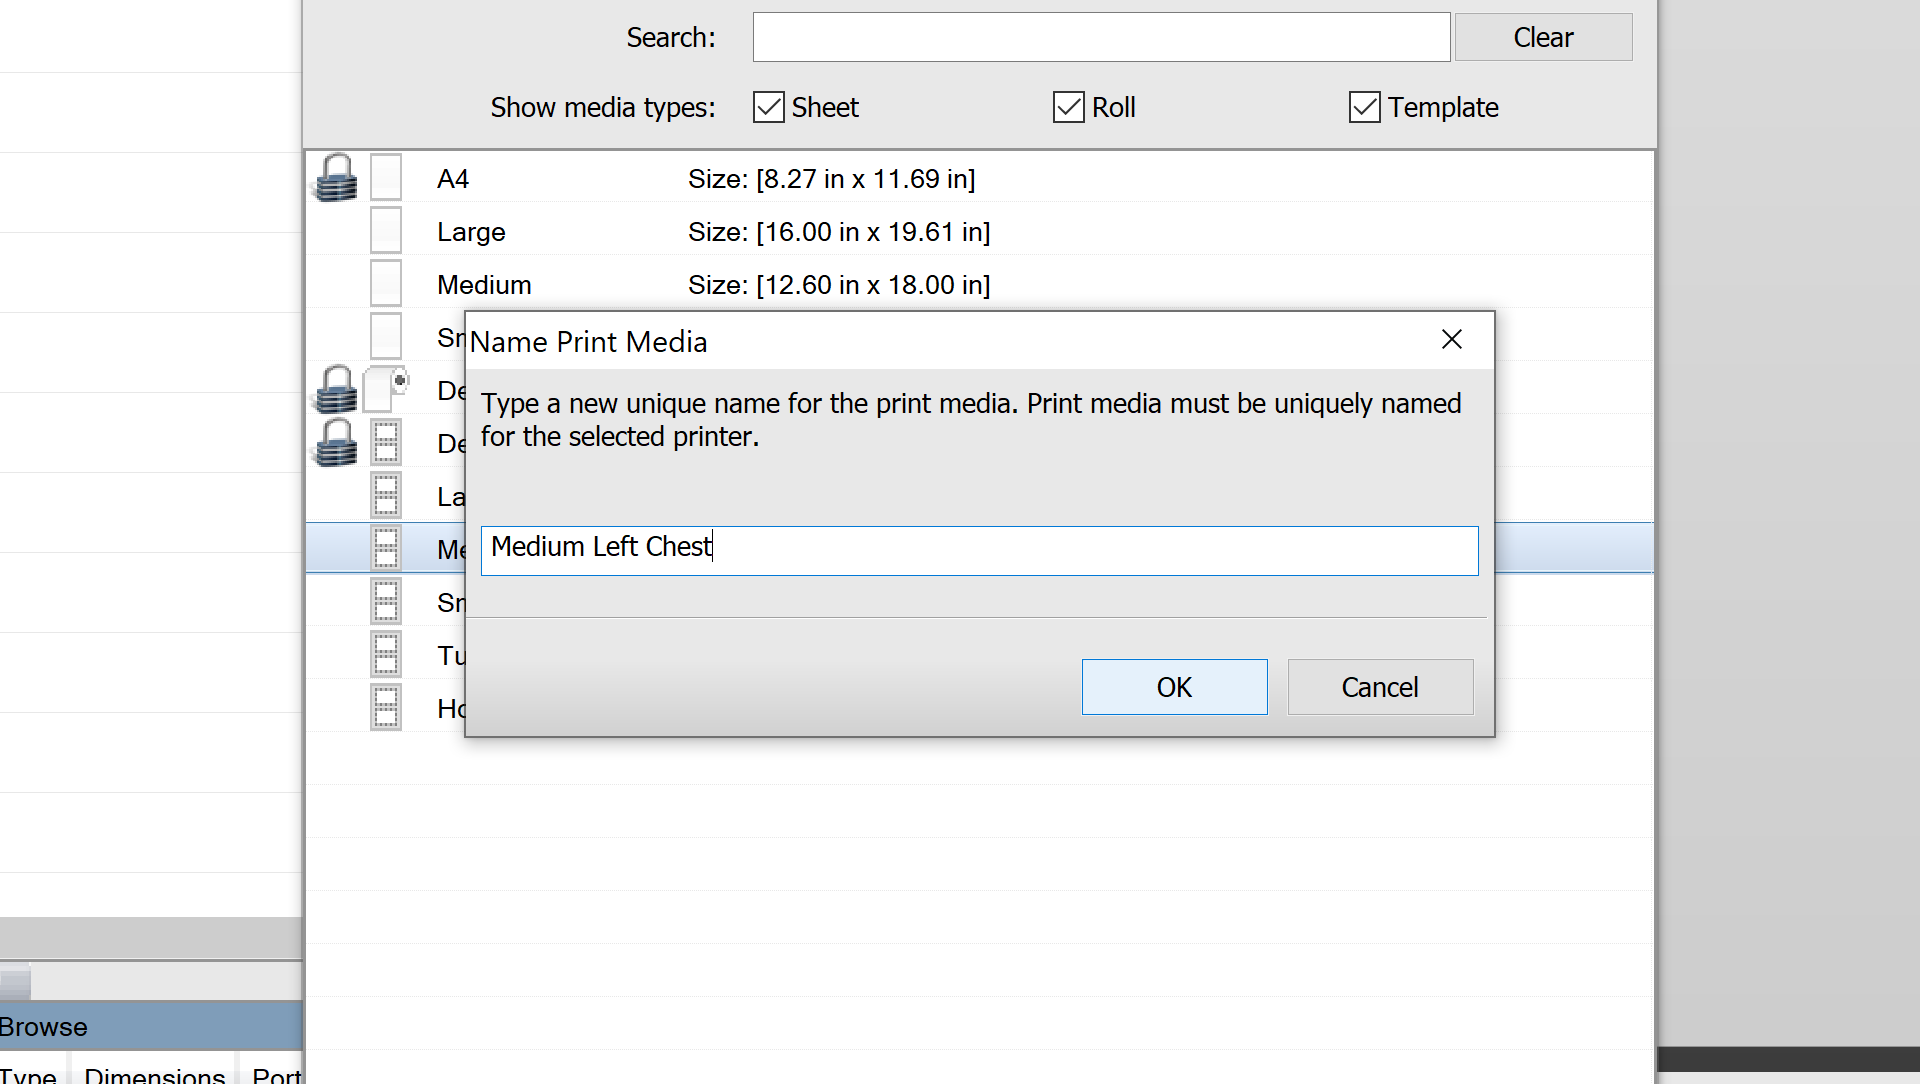
A box will appear called: Name Print Media. Name the media: “Medium Left Chest”. This will allow you to remember that it belongs on the medium platen. Then, press OK.
Next, double click on the “Medium Left Chest” shown in the Printer Media Manager window. A new window will appear called the “Template Setup”. Here, we will make the necessary changes in this template setup window to create the layout template for the left chest.

There are a few things to notice in this window.
- The name of the template.
- What this template is based on.
- The Slot configuration.
- A preview window of where your slot configuration will be.
- Near the bottom, you have some tools and the current Slot for this template.
We need to select the current Slot (highlight it) near the bottom of the window. Then, click on “Change”.
This will allow us to edit the Slot configuration.
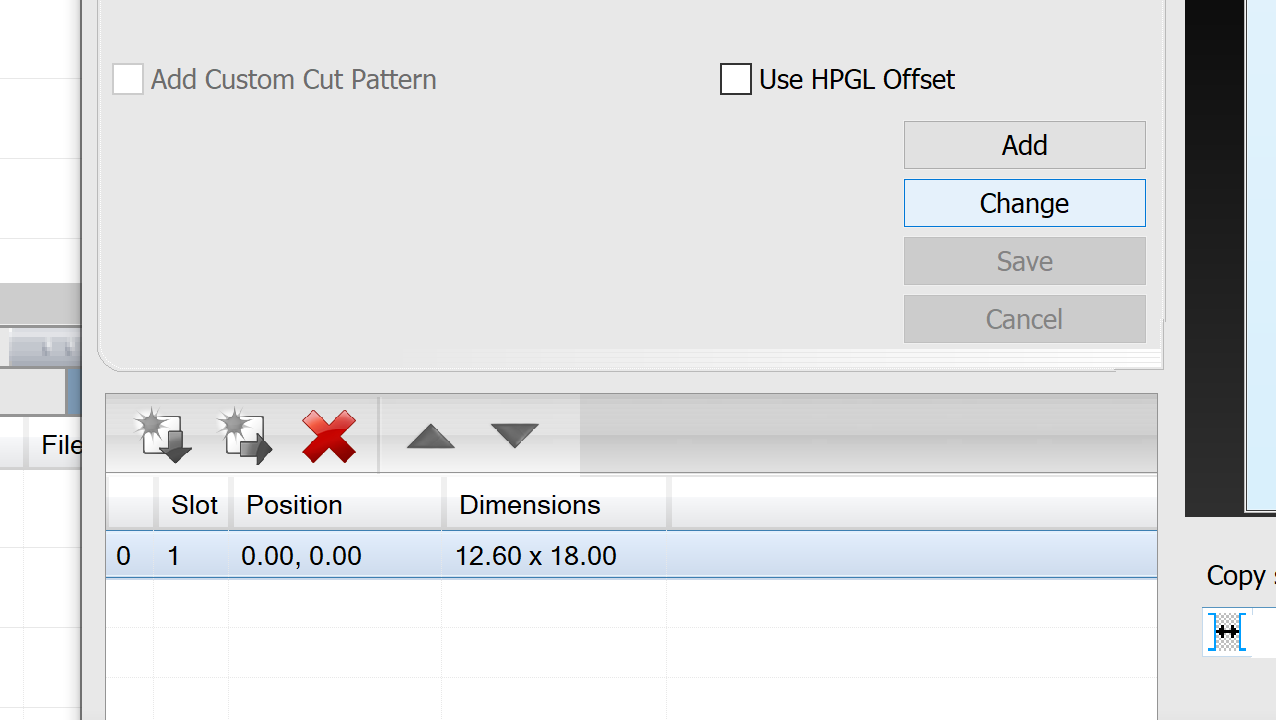
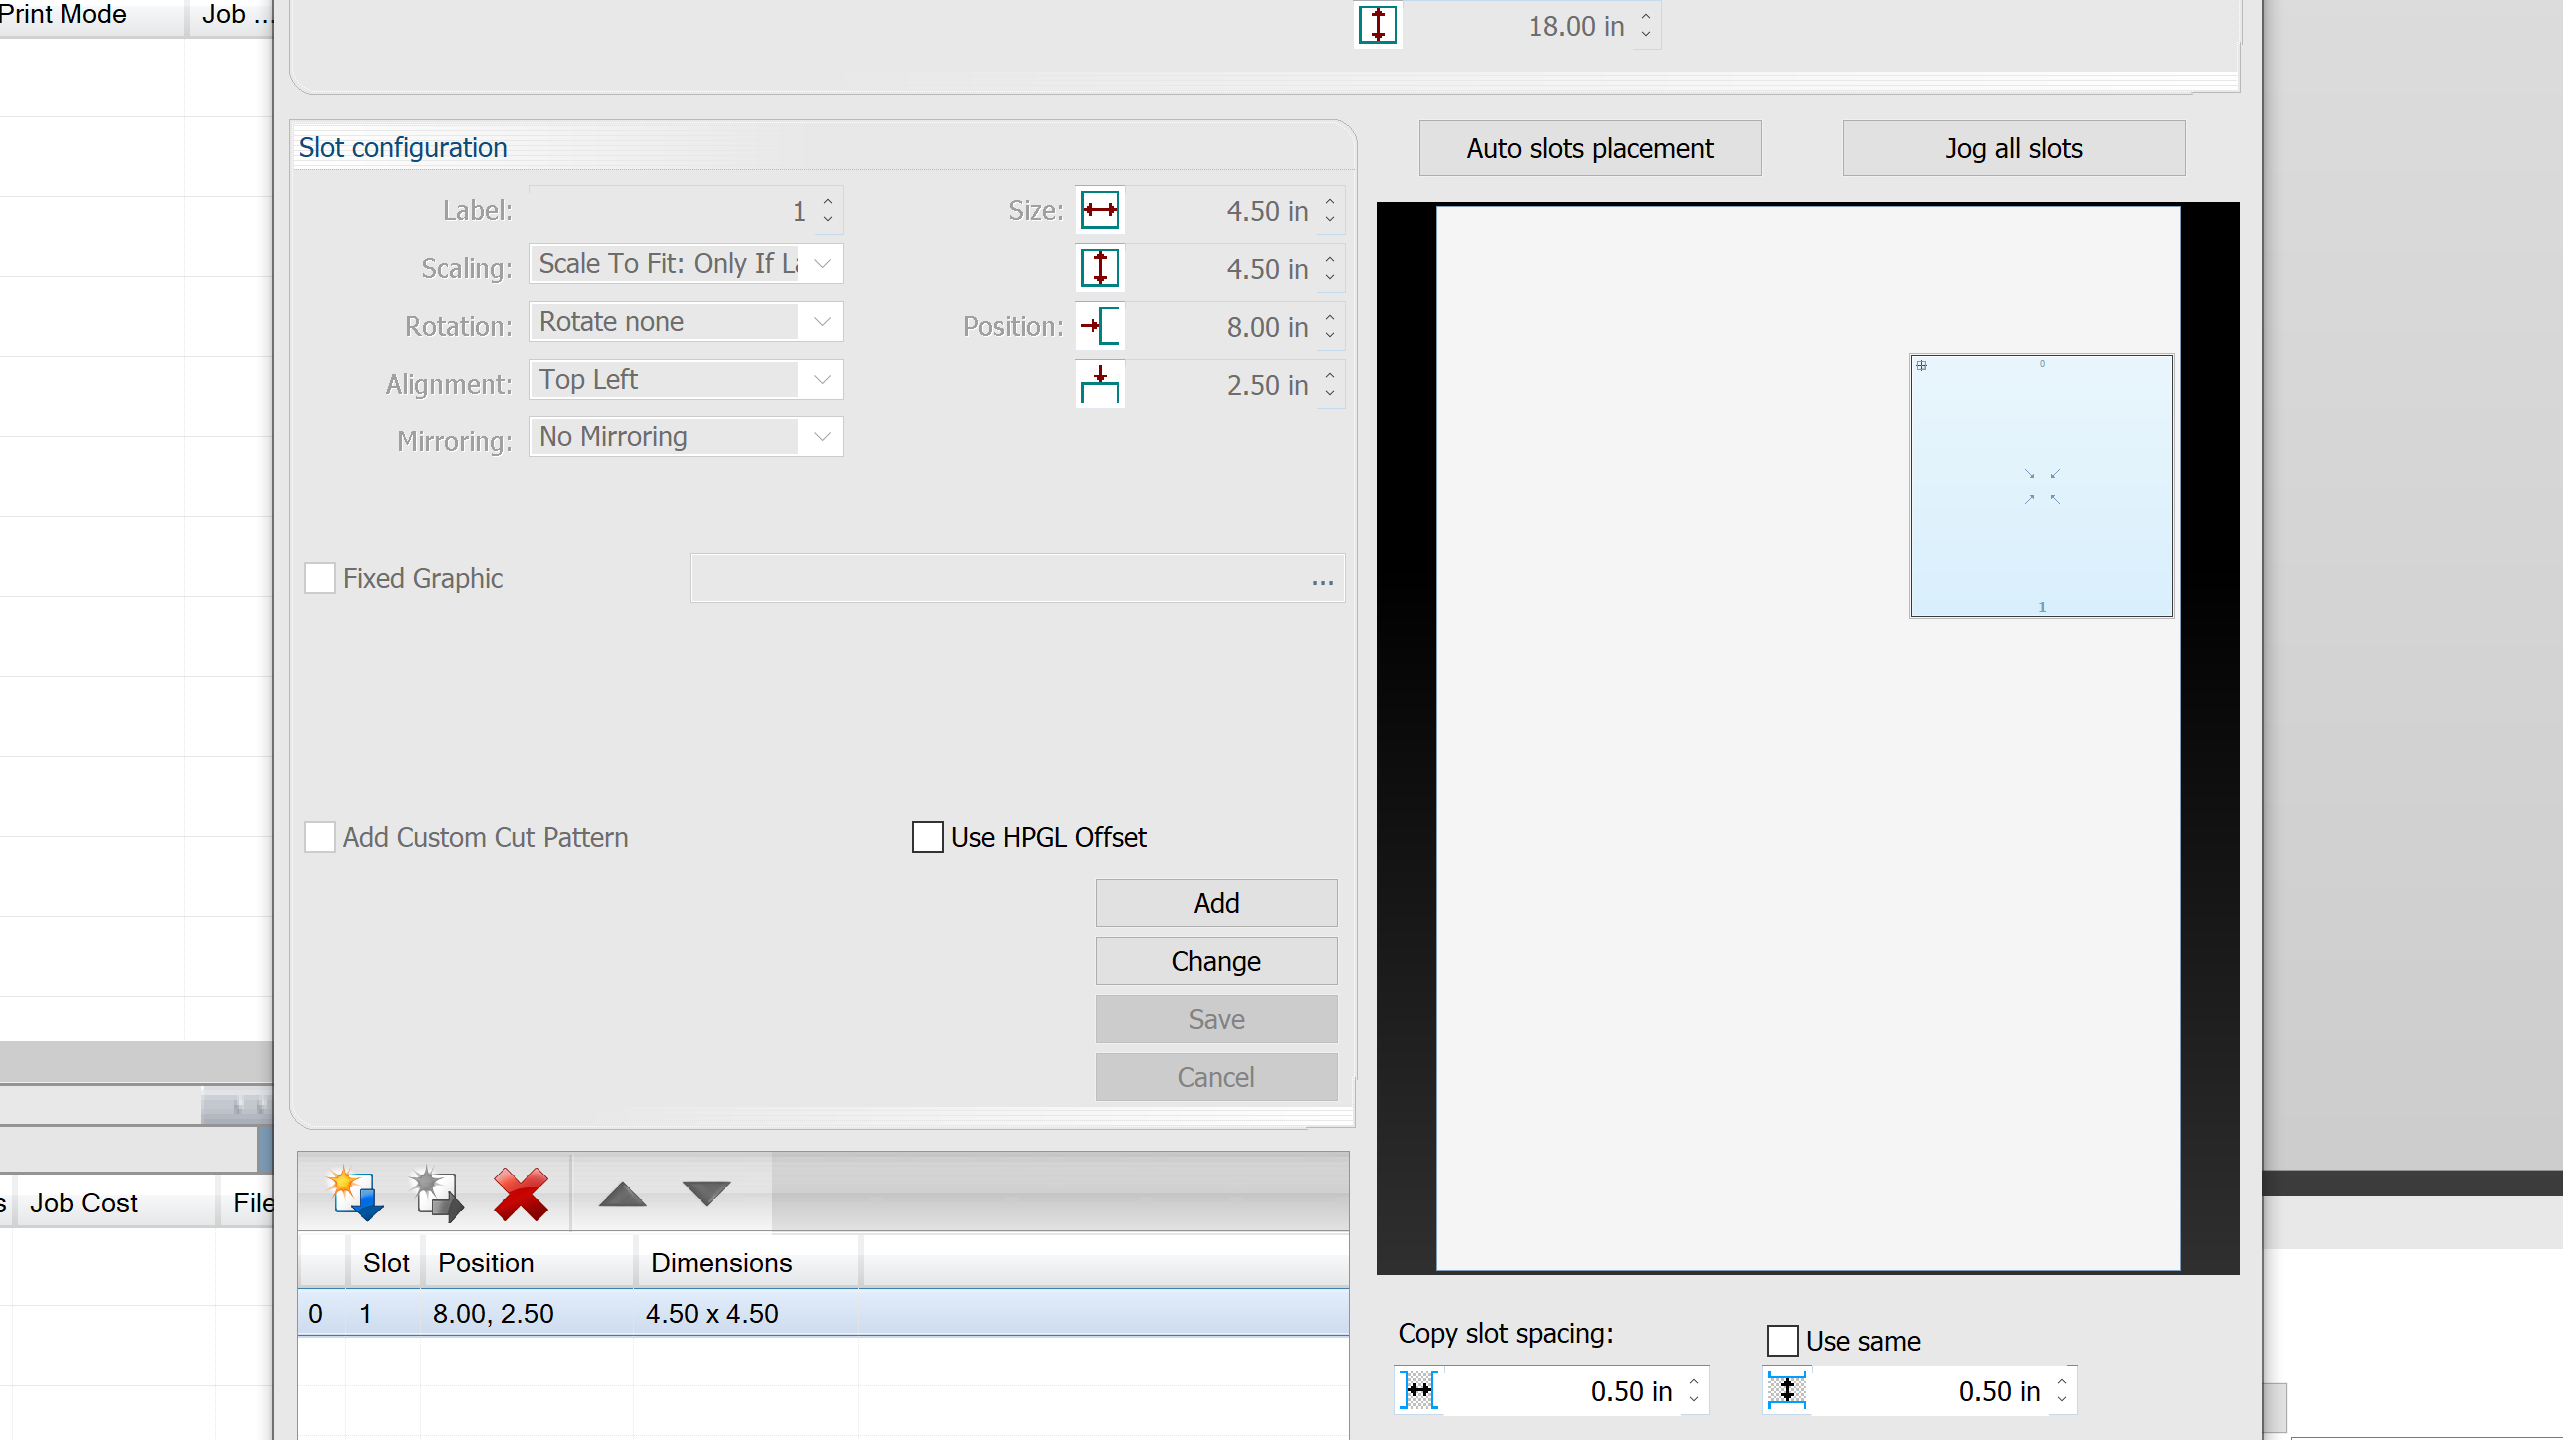
A left chest print area is usually about the size of a business card. However, to allow yourself to have a bit more print area, we are just going to create a 4.5 by 4.5 square.
To do this, we will type “4.5” into the two spots at the Size section in the Slot configuration area.
When thinking about where a left chest print should be, we always want to be slightly left of the center line. The platen is 12.6 x 18. Half of 12.6 inches is 6.3 inches. To be slightly left of 6.3, let’s make the number 8.
To do this, we will type “8” into the first spot at the Position section in the Slot configuration area.
Then, we want to be about 2.5 inches down from the top. So, we will type “2.5” into the second spot at the Position section in the Slot configuration area.
For Scaling, we want this to say: “Scale to Fit, Only If Larger”. This will scale down an image automatically for you to fit within this slot that we are creating.
Alignment: This should be at “Top Left”. This will make sure that all images start at the top left.
For this tutorial, we do not need to rotate or mirror the image.

Once you have made these changes, click on the Save button located within the Slot configuration area.
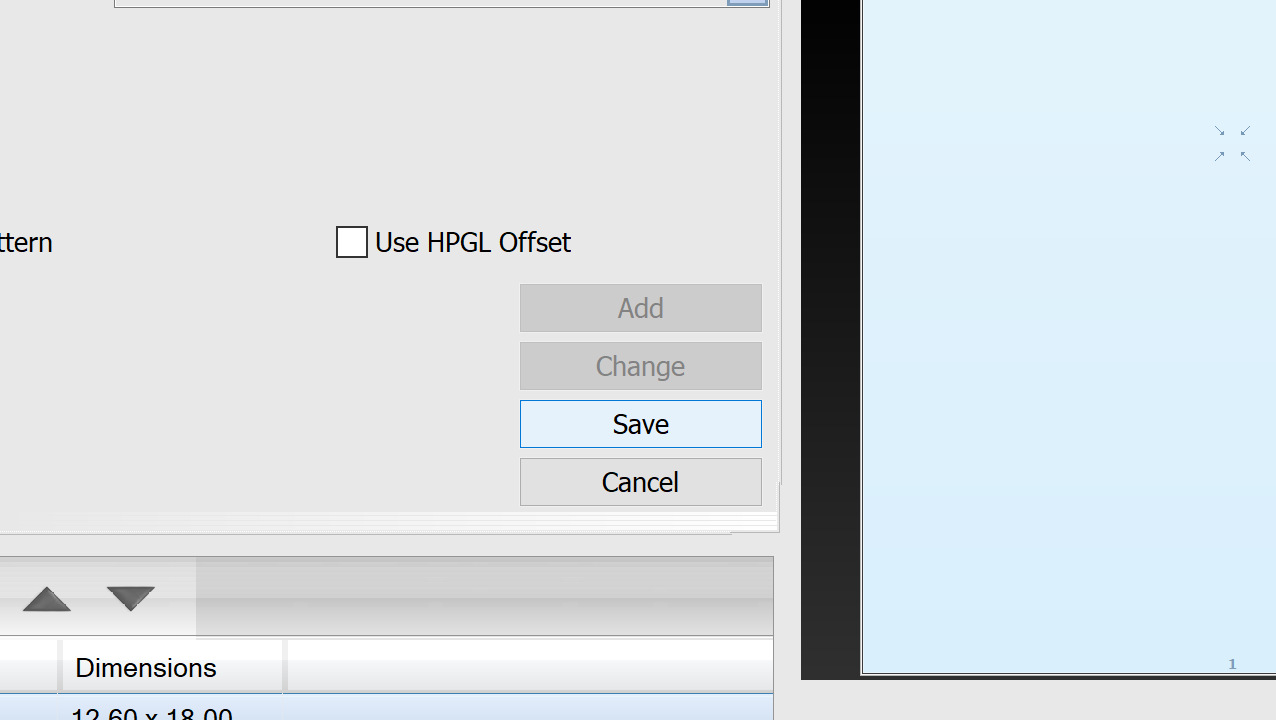
Once you click on Save, you will see the preview window change to show you the new slot area that your image will appear.
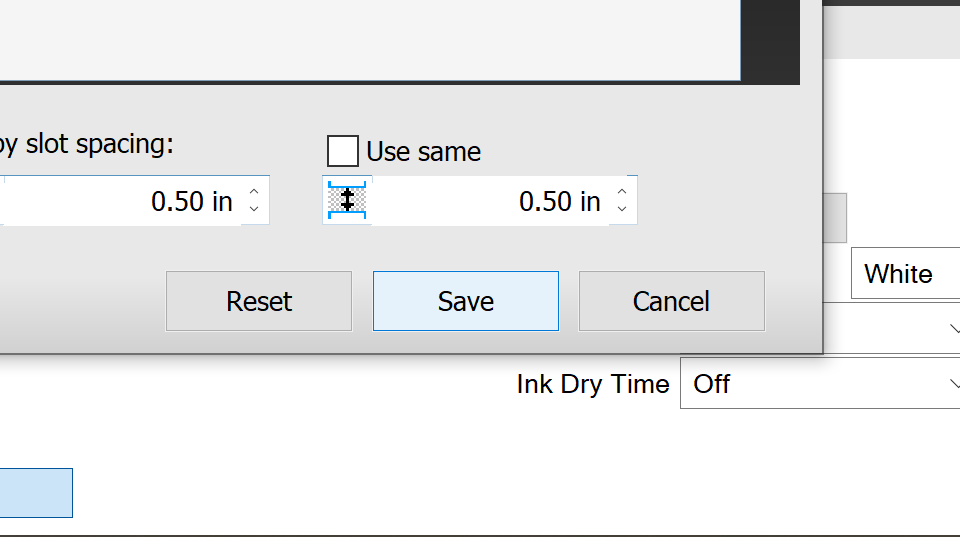
If the new slot area is where you want it to be, click on the Save button at the bottom of the Template Setup window to save all the data you just put in.
Close out of the “Printer Media Manager” window. Now, when you click on the platen size you want to use, you will see a new listing for “Medium Left Chest” that you just created.
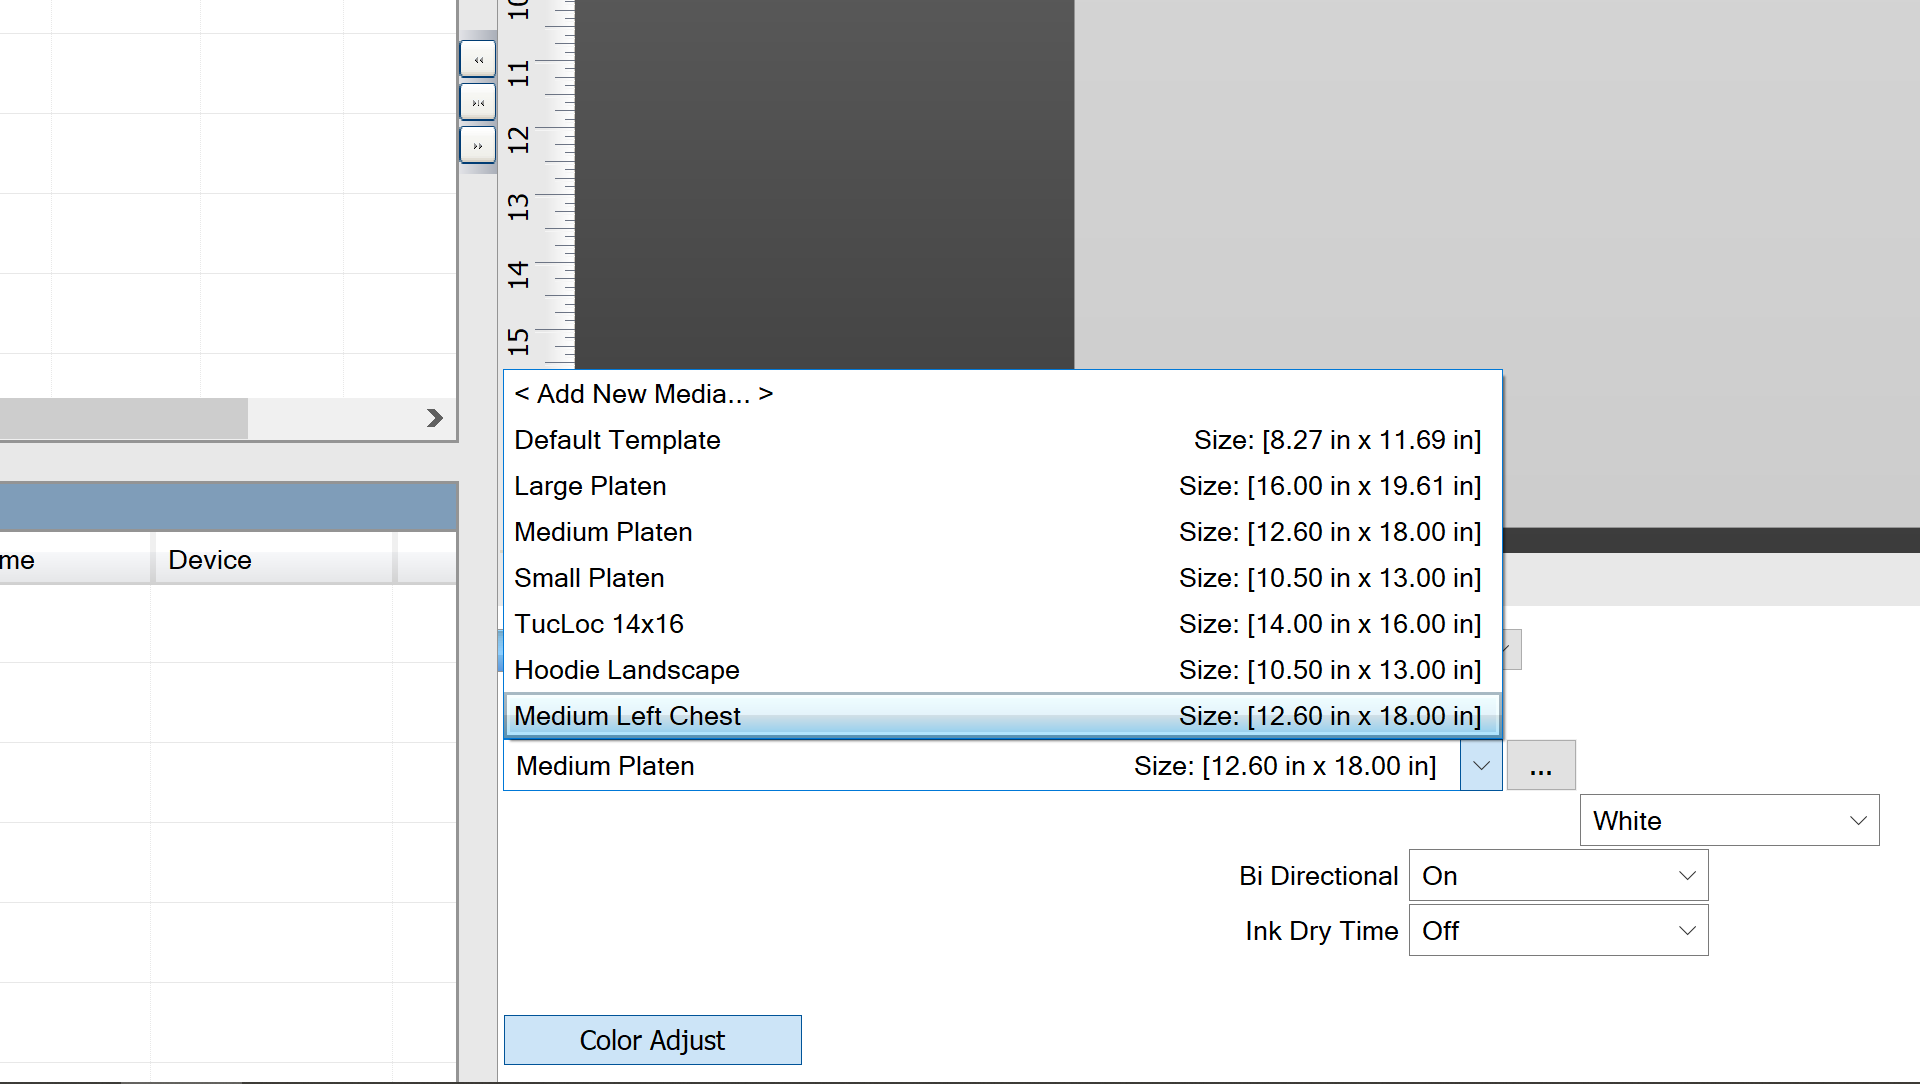
When you click on this platen option, you will see the preview window change to show you where an image will appear once you load one.
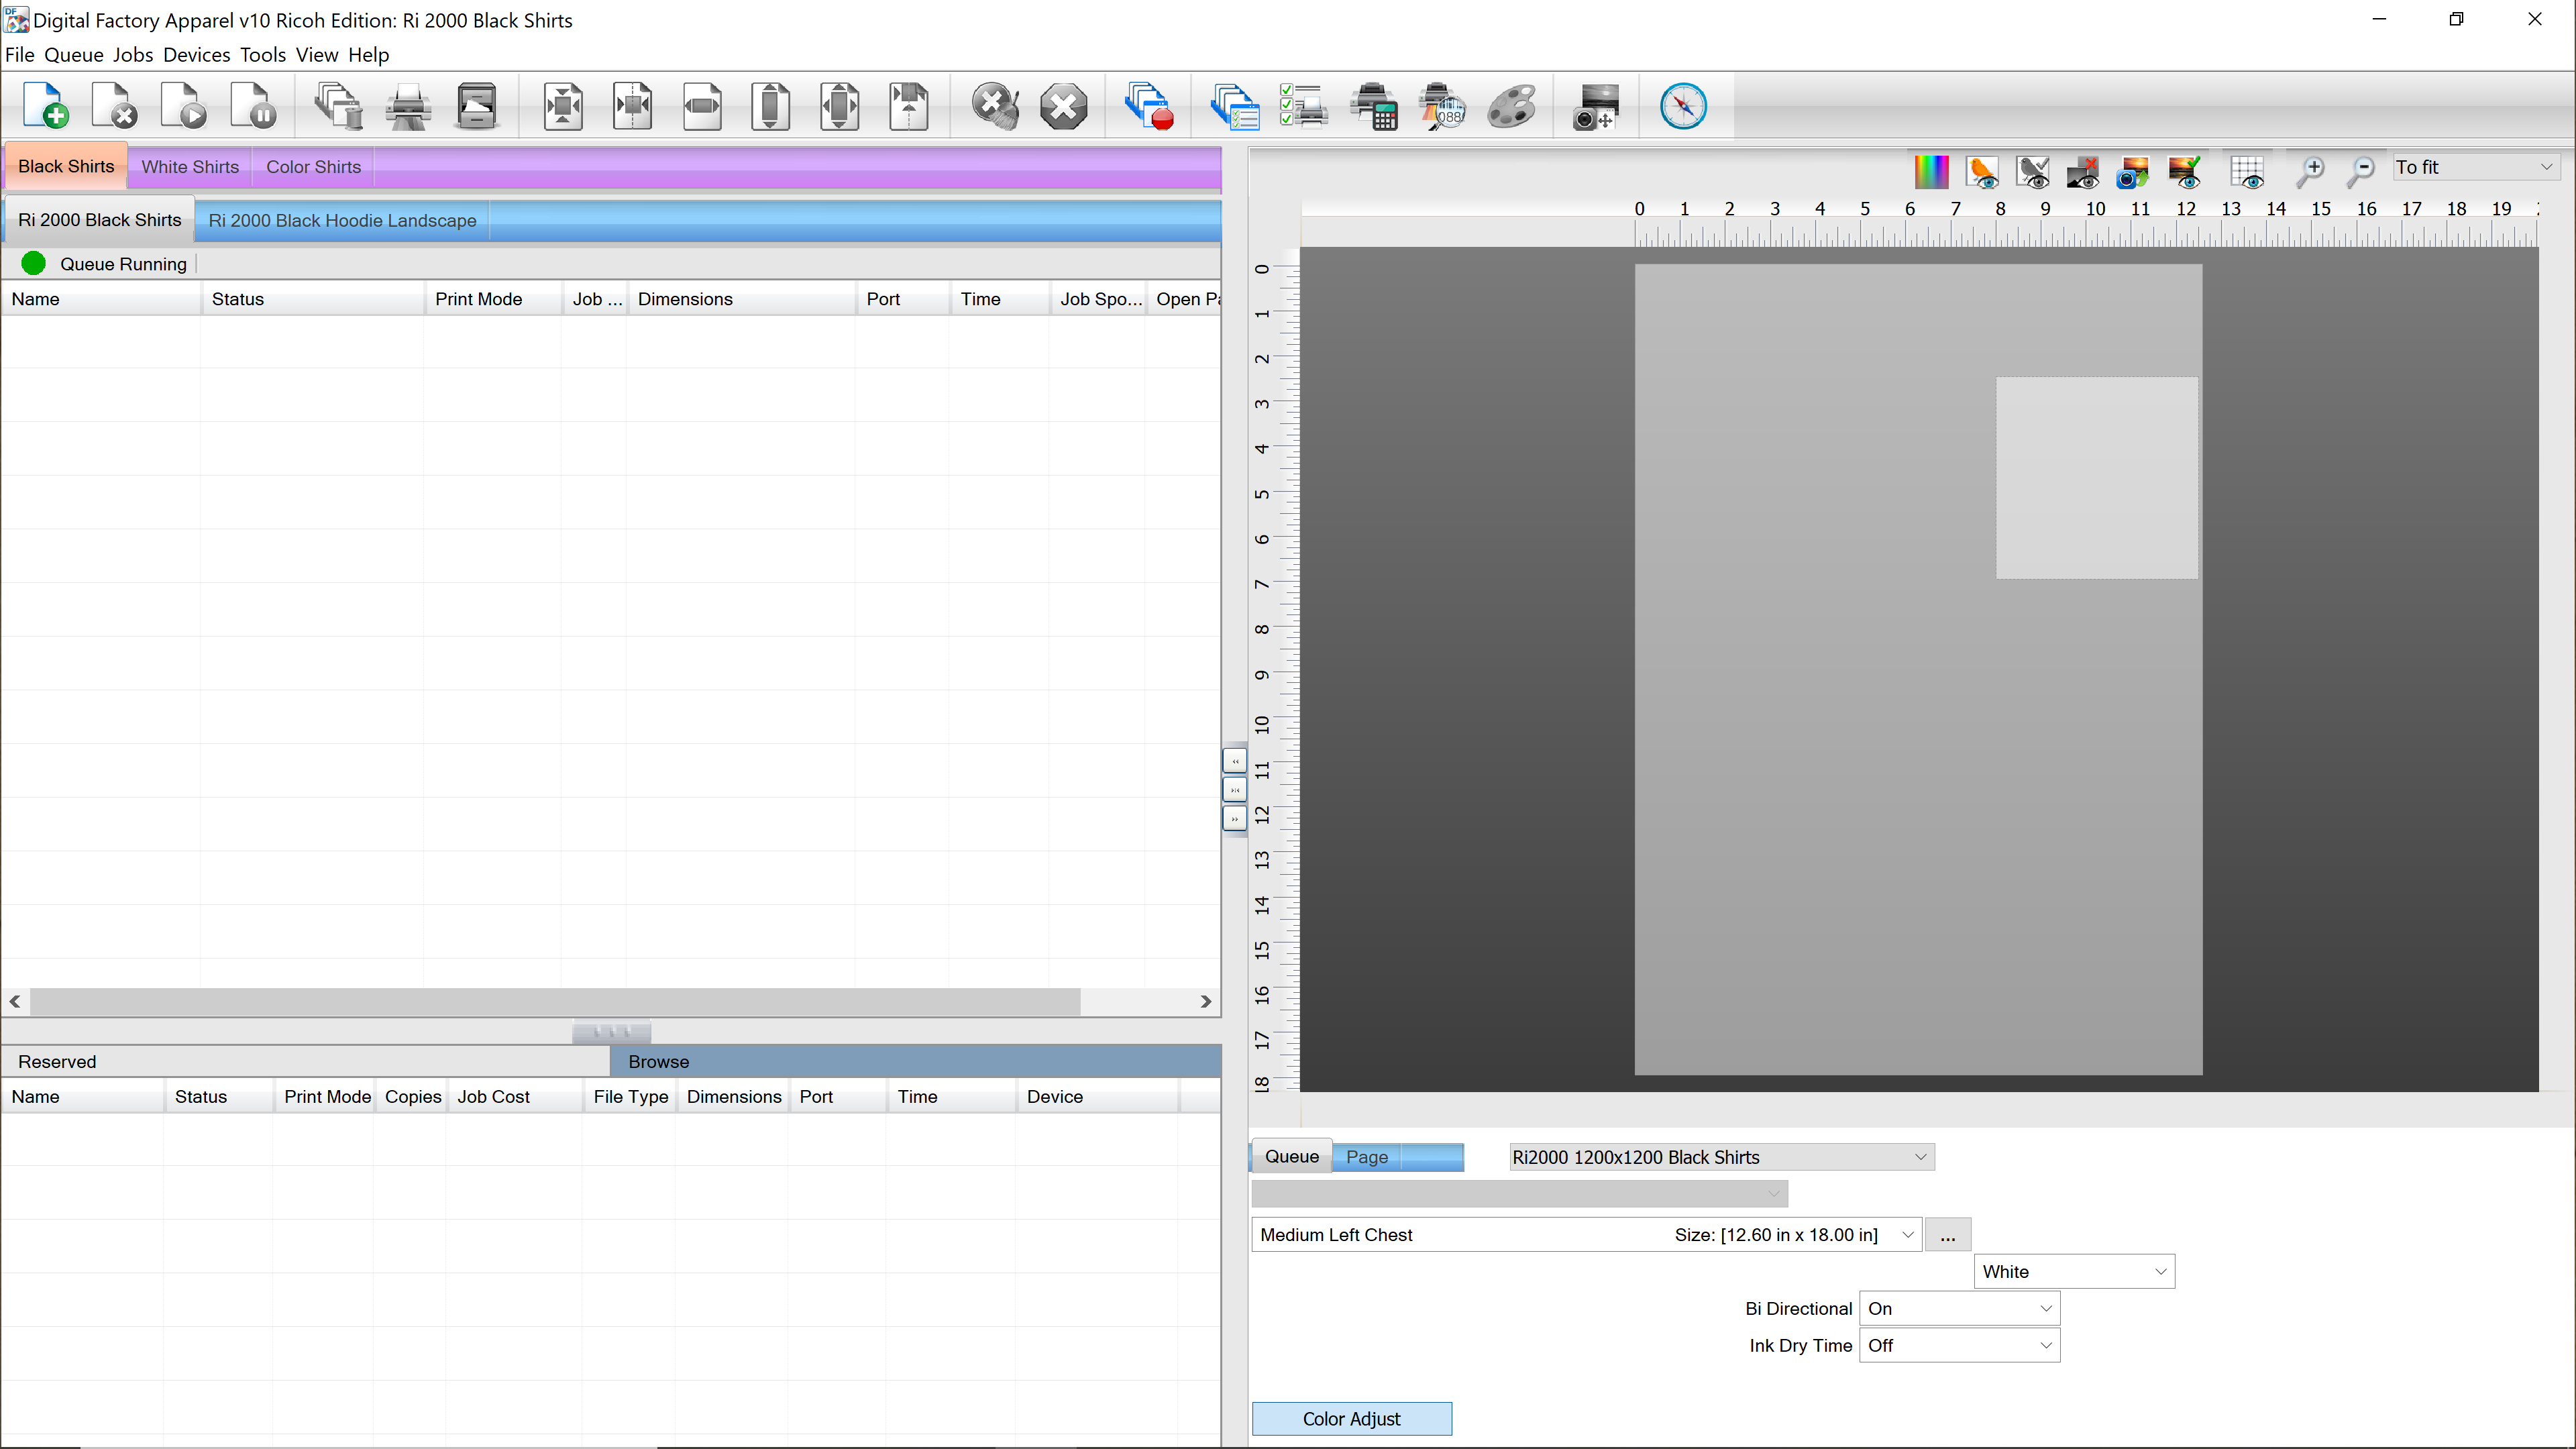
Now, load an image into CADlink and you’ll see it appears only in the new slot that you just created.
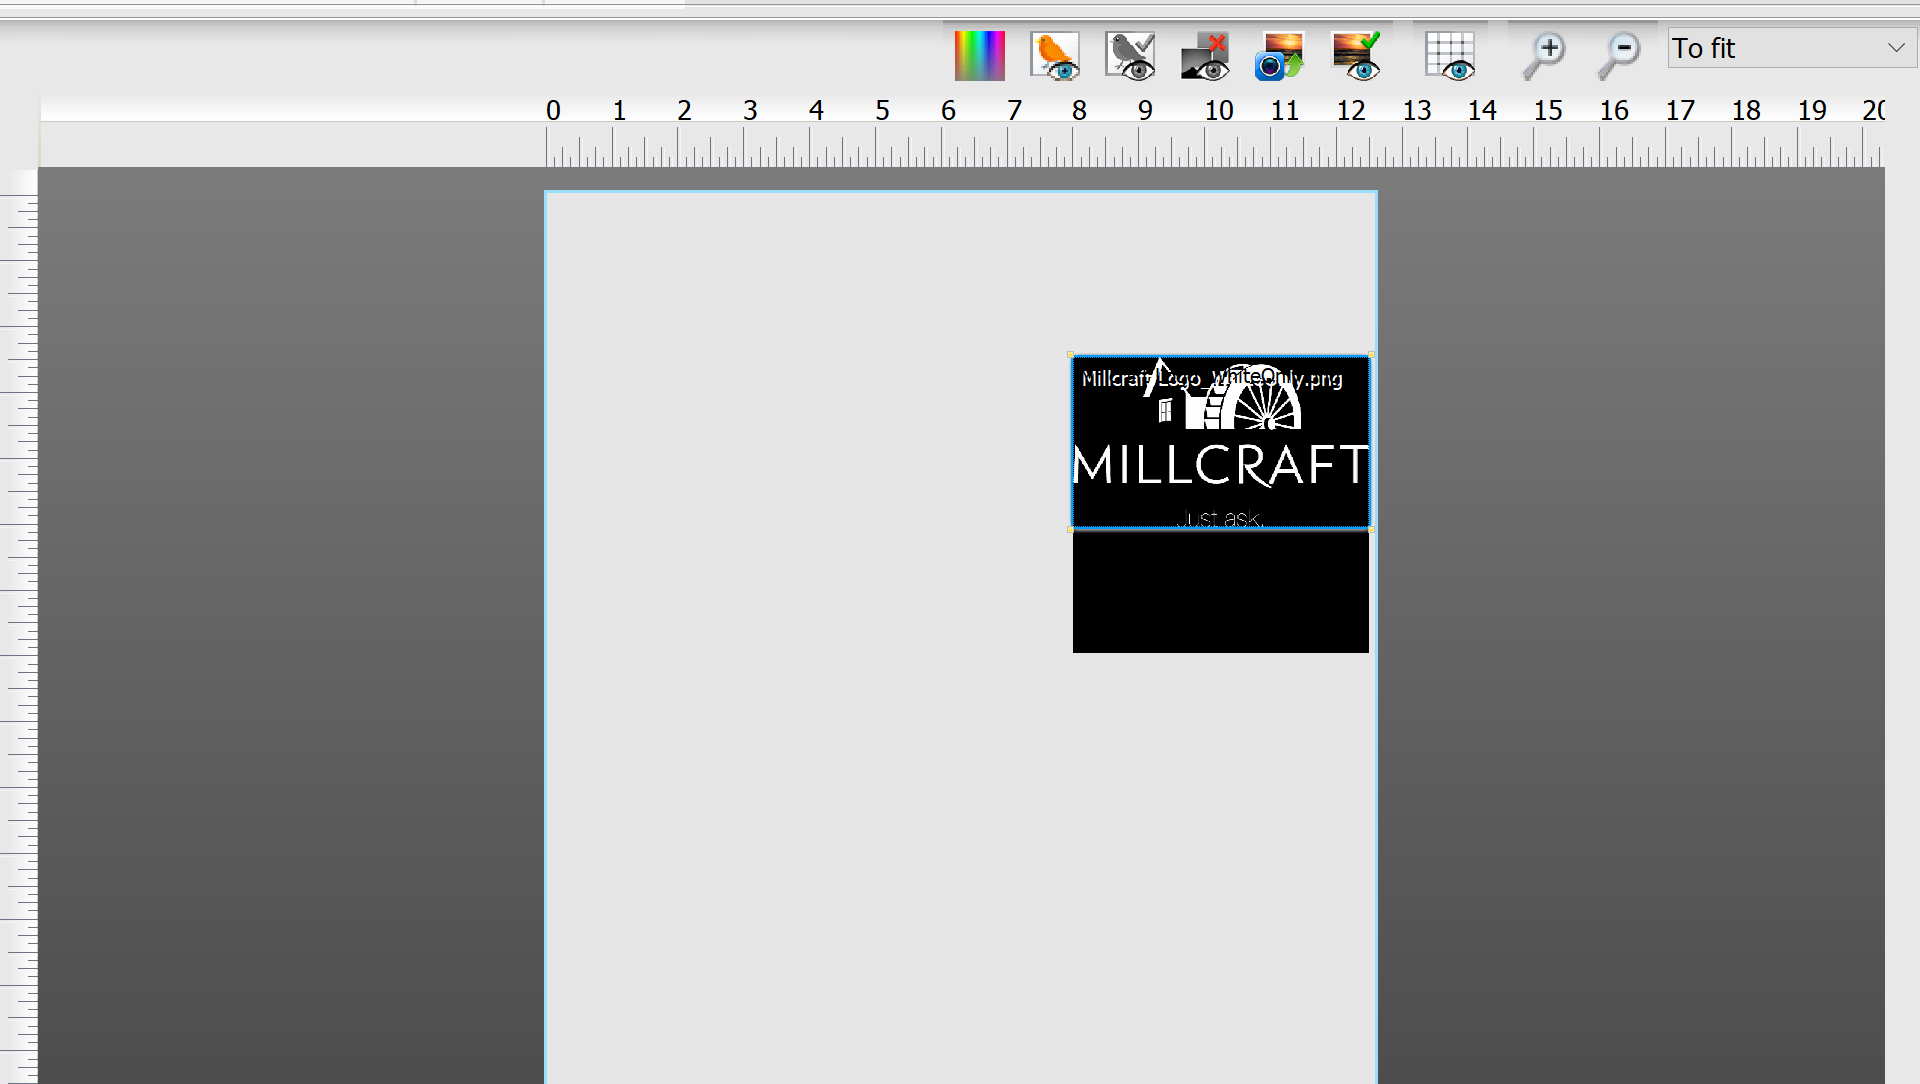
Now you are set to load a shirt and print. You will see that the print will hit right where a left chest print would.
Follow these steps again to create as many templates that your business needs. Using these templates helps to save time and add consistency in your prints.
BONUS: Create a Queue for Left Chest
Now that you have created the Left Chest template, you can use this template to also create a Queue for it. This will allow you to have a Queue option that is always ready to print a left chest.
Once this has been set up, importing any image into this Queue will automatically place it in the left chest print area.
Follow the steps below to get this setup.

The first thing we need to do is open our Manager Queues… window.
Click on Queue > Manage Queues…
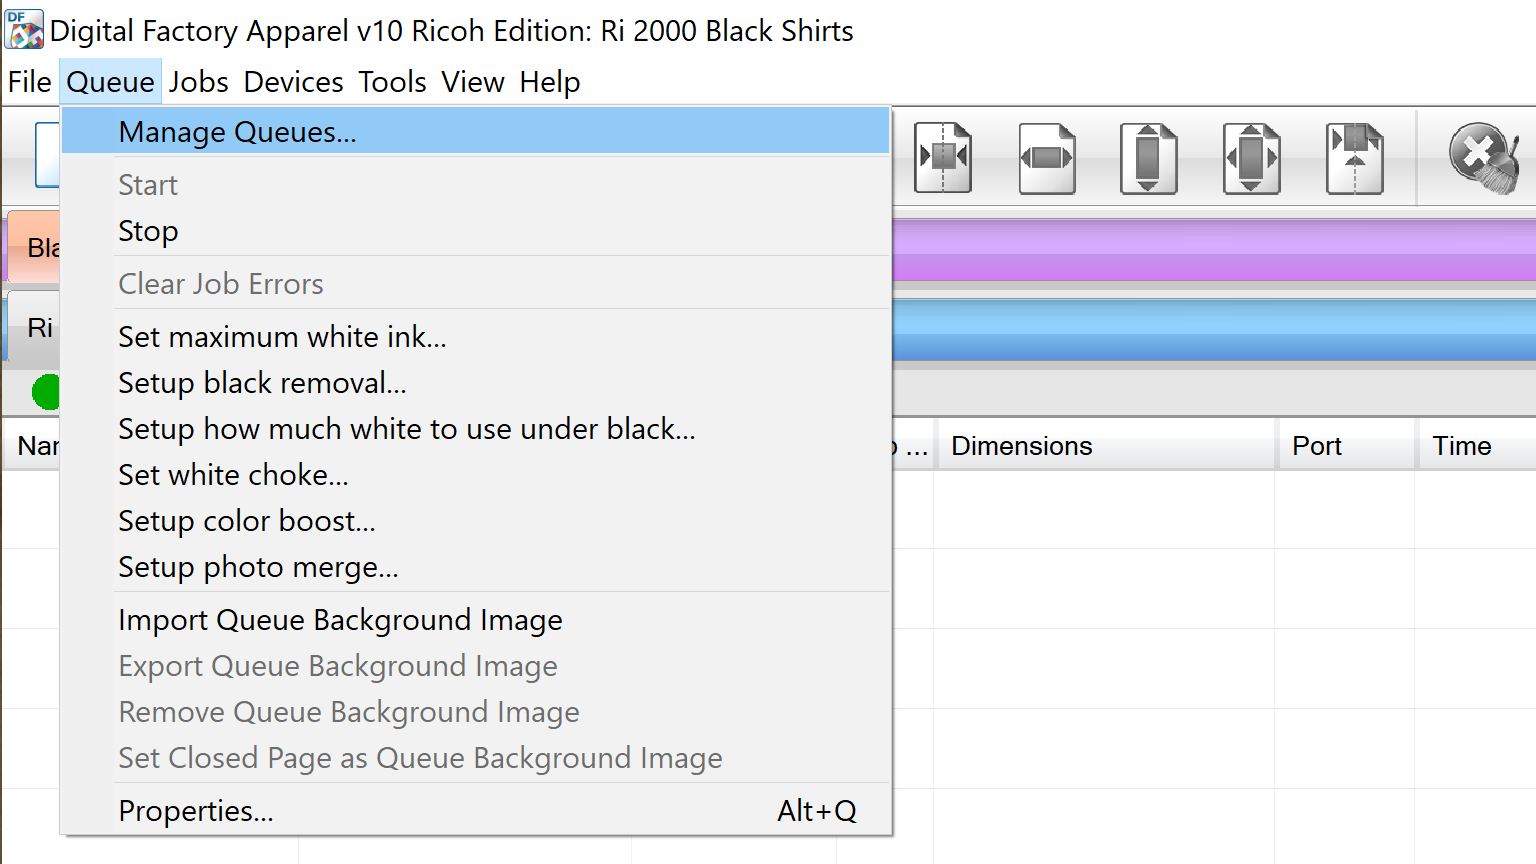
Once you click on Manage Queues… the Queue Manager window will appear.
Click on the Black Shirts queue to highlight the queue. In the example, we are clicking on the Ri 2000 Black Shirts.
Once that queue is selected, click on the “Copy Queue” icon on the top row.
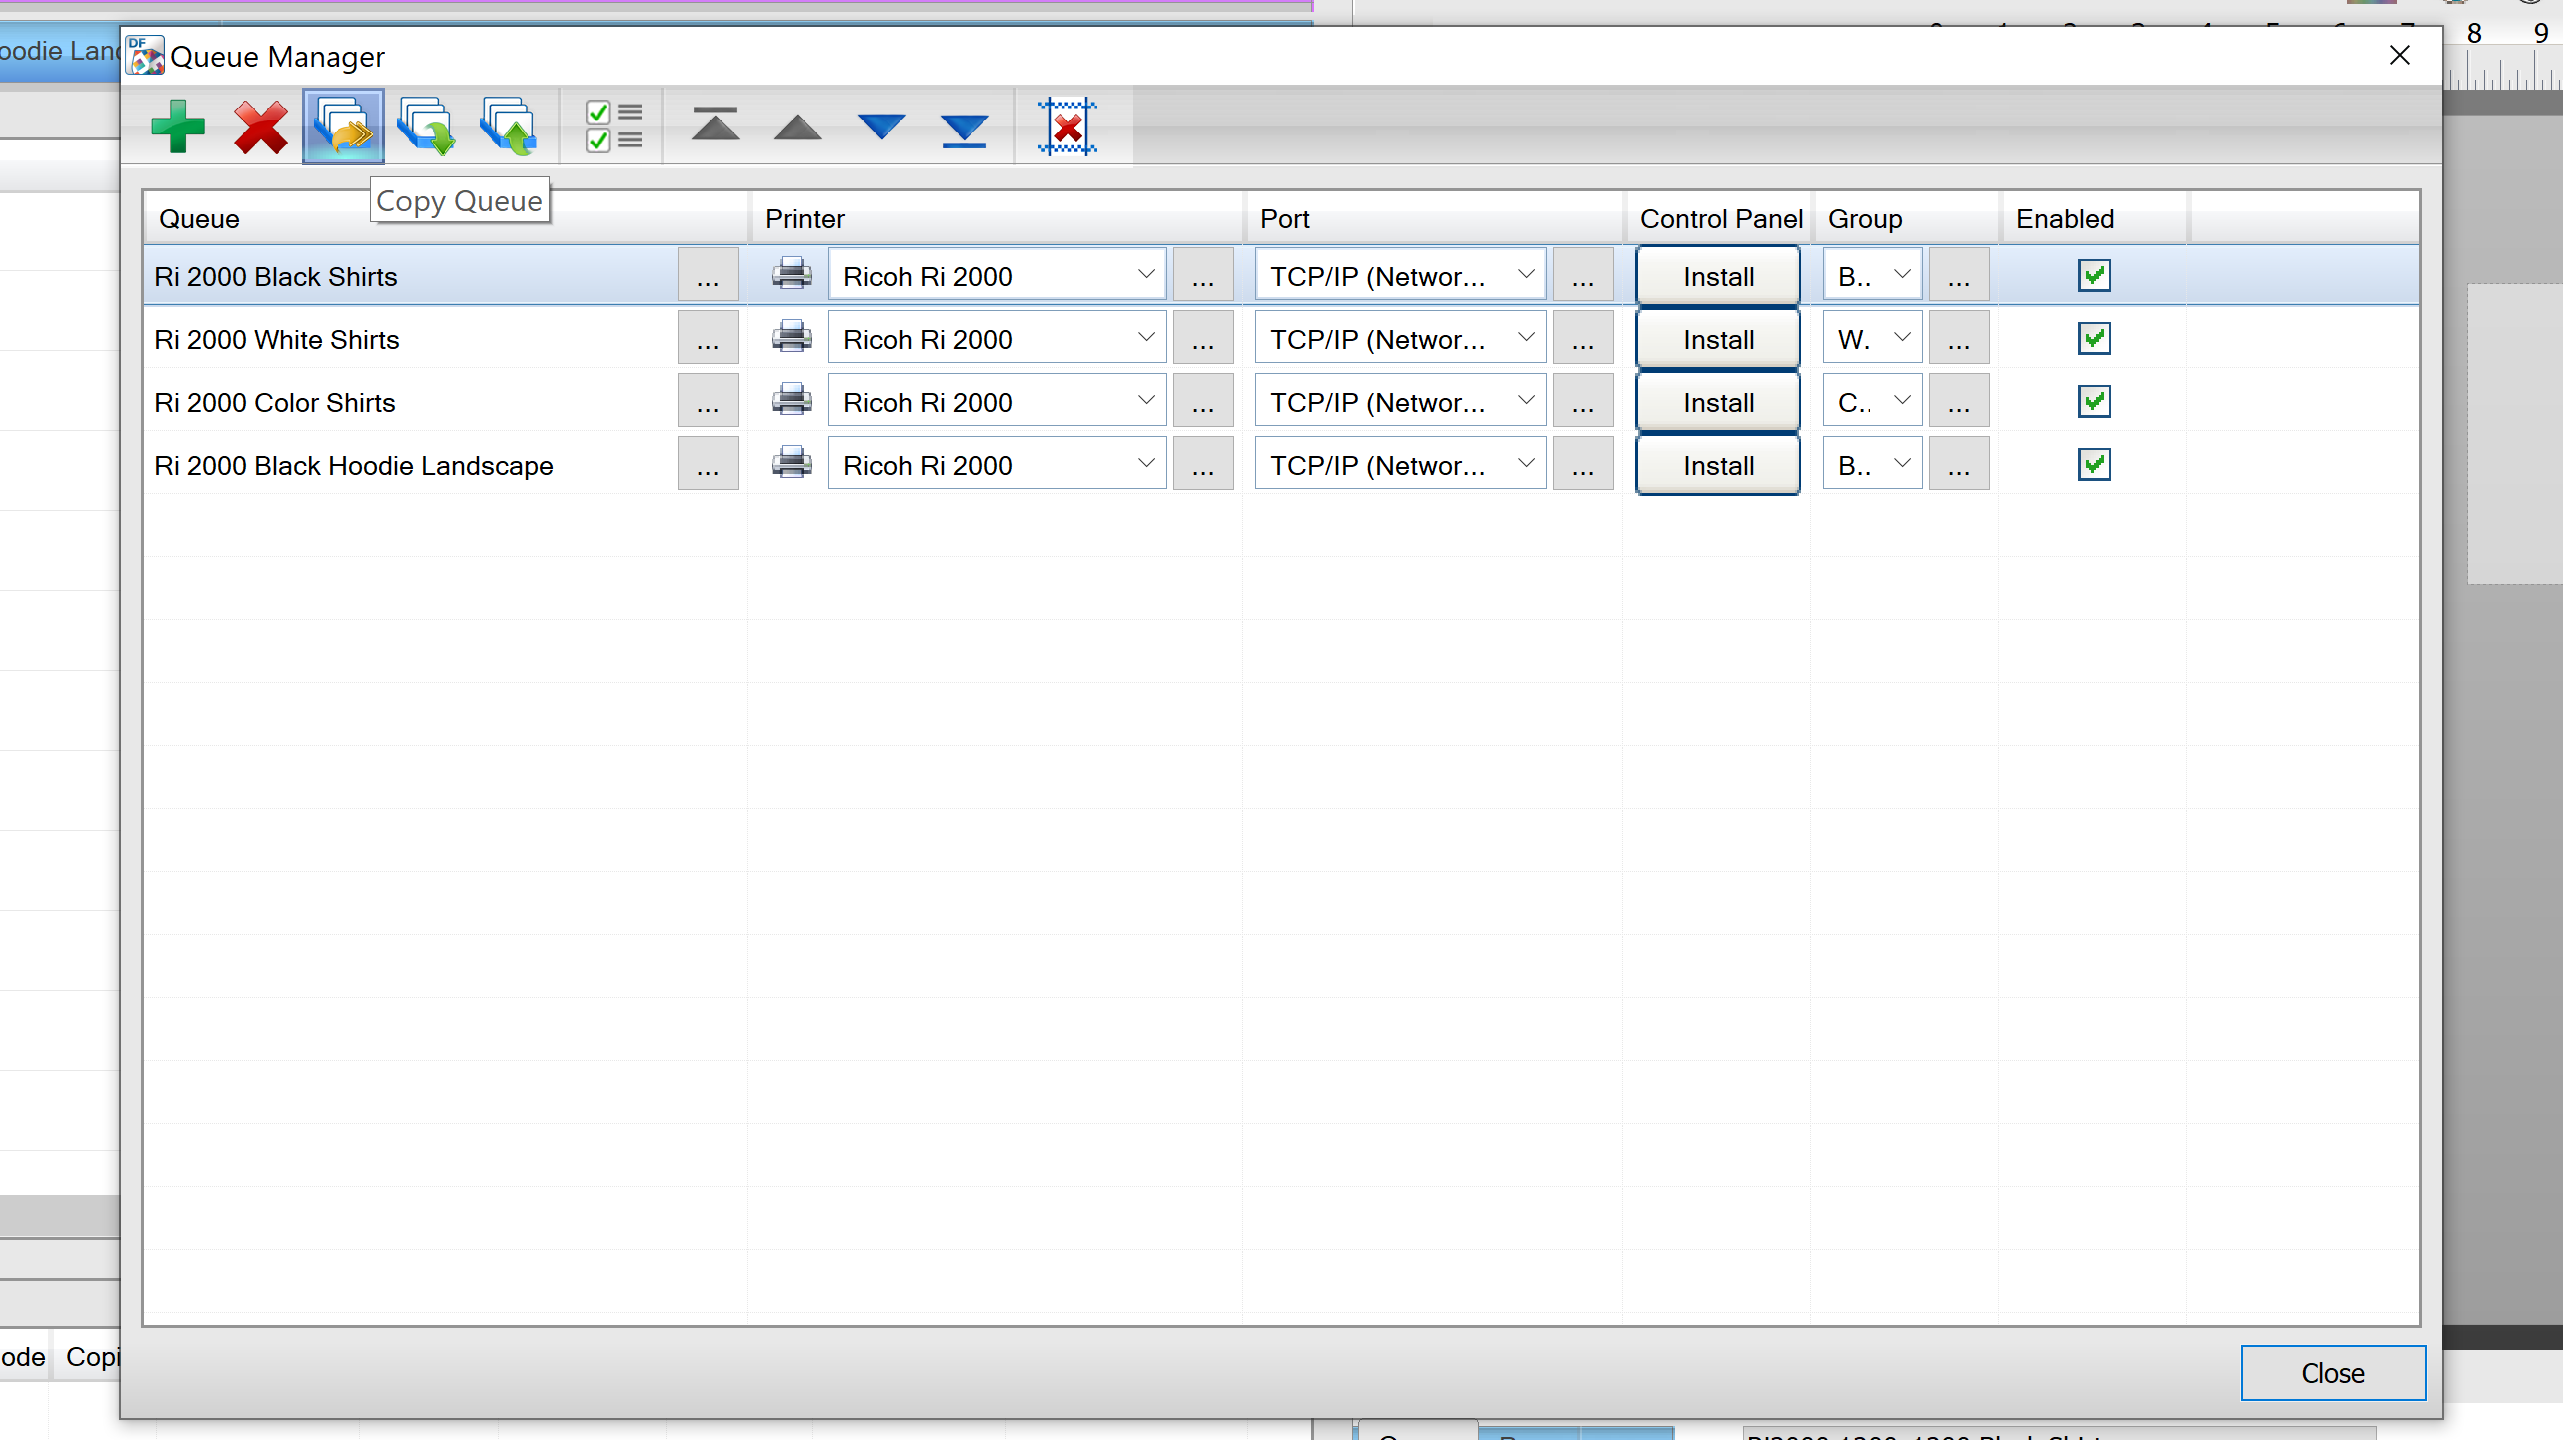
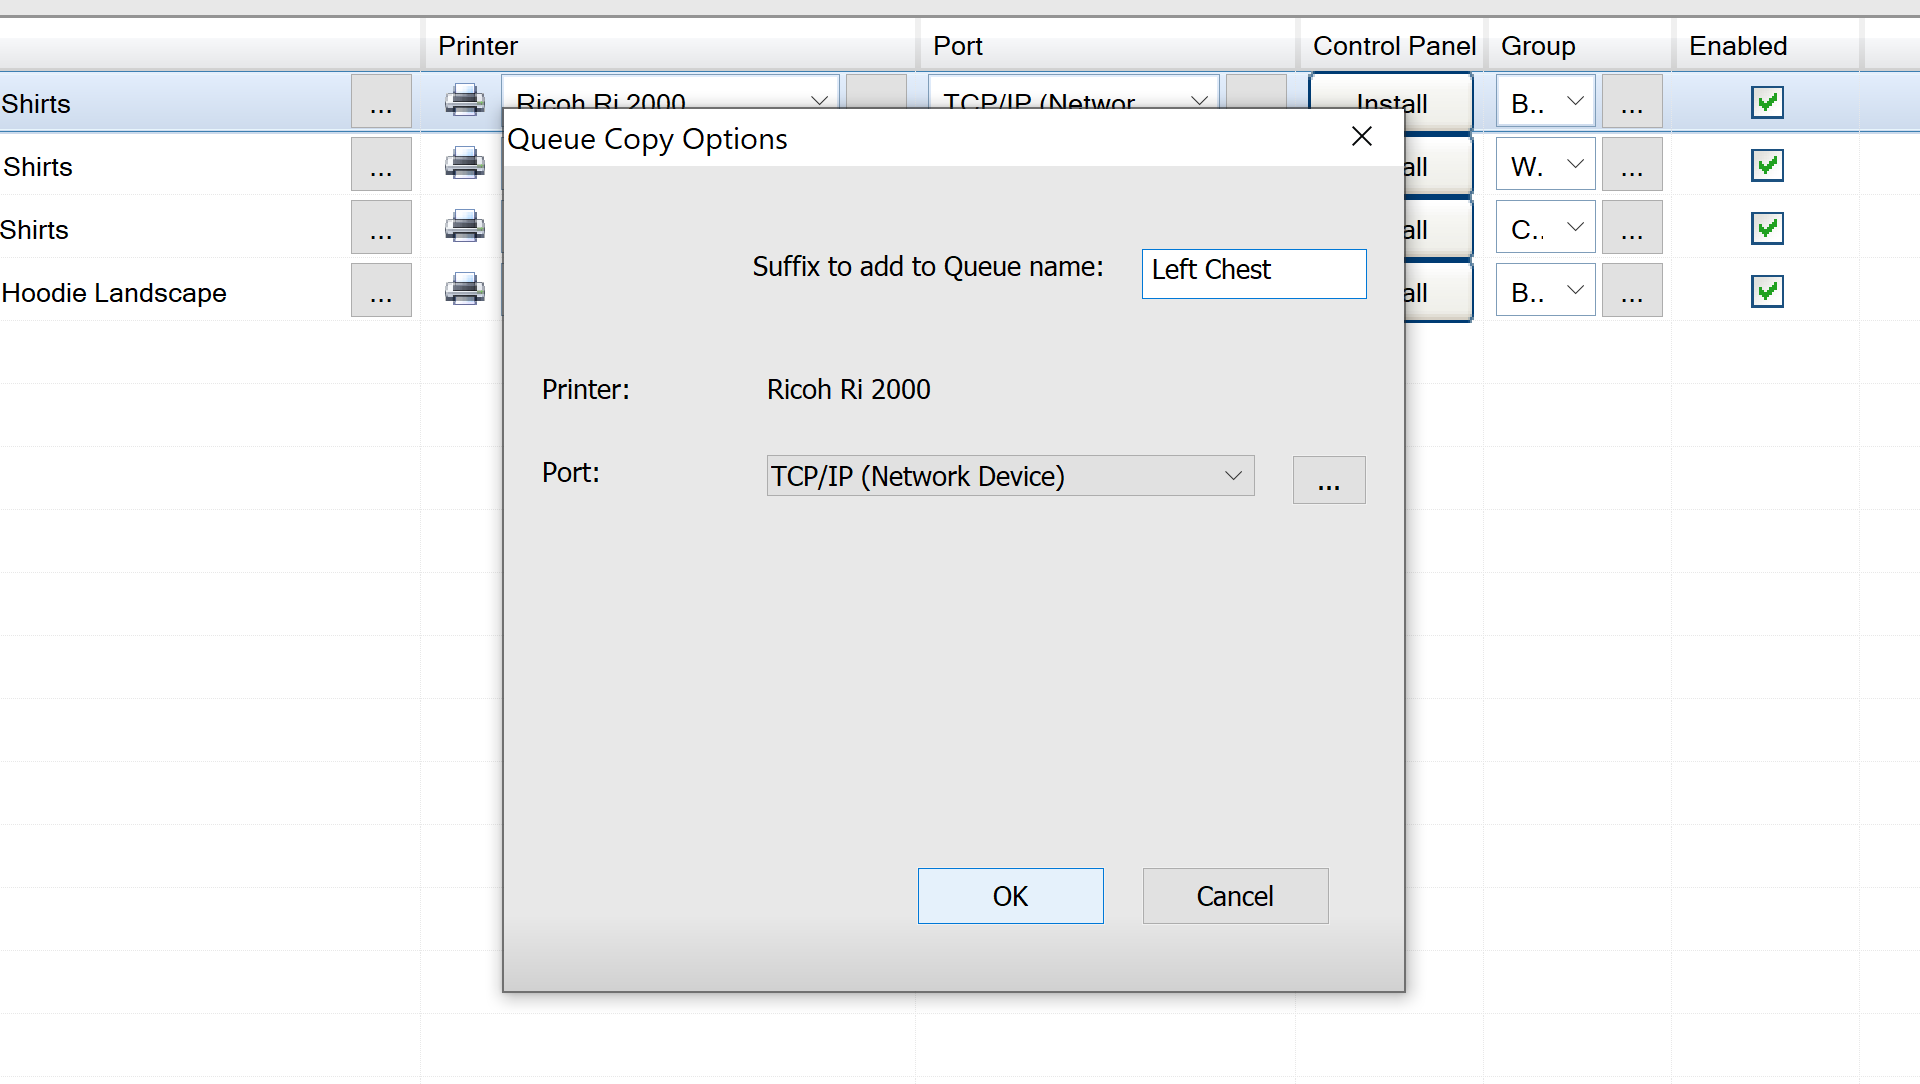
A new window will appear called Queue Copy Options.
You should see: “suffix to add to Queue name” Type in “Left Chest”. Then click on the OK at the bottom of the window.
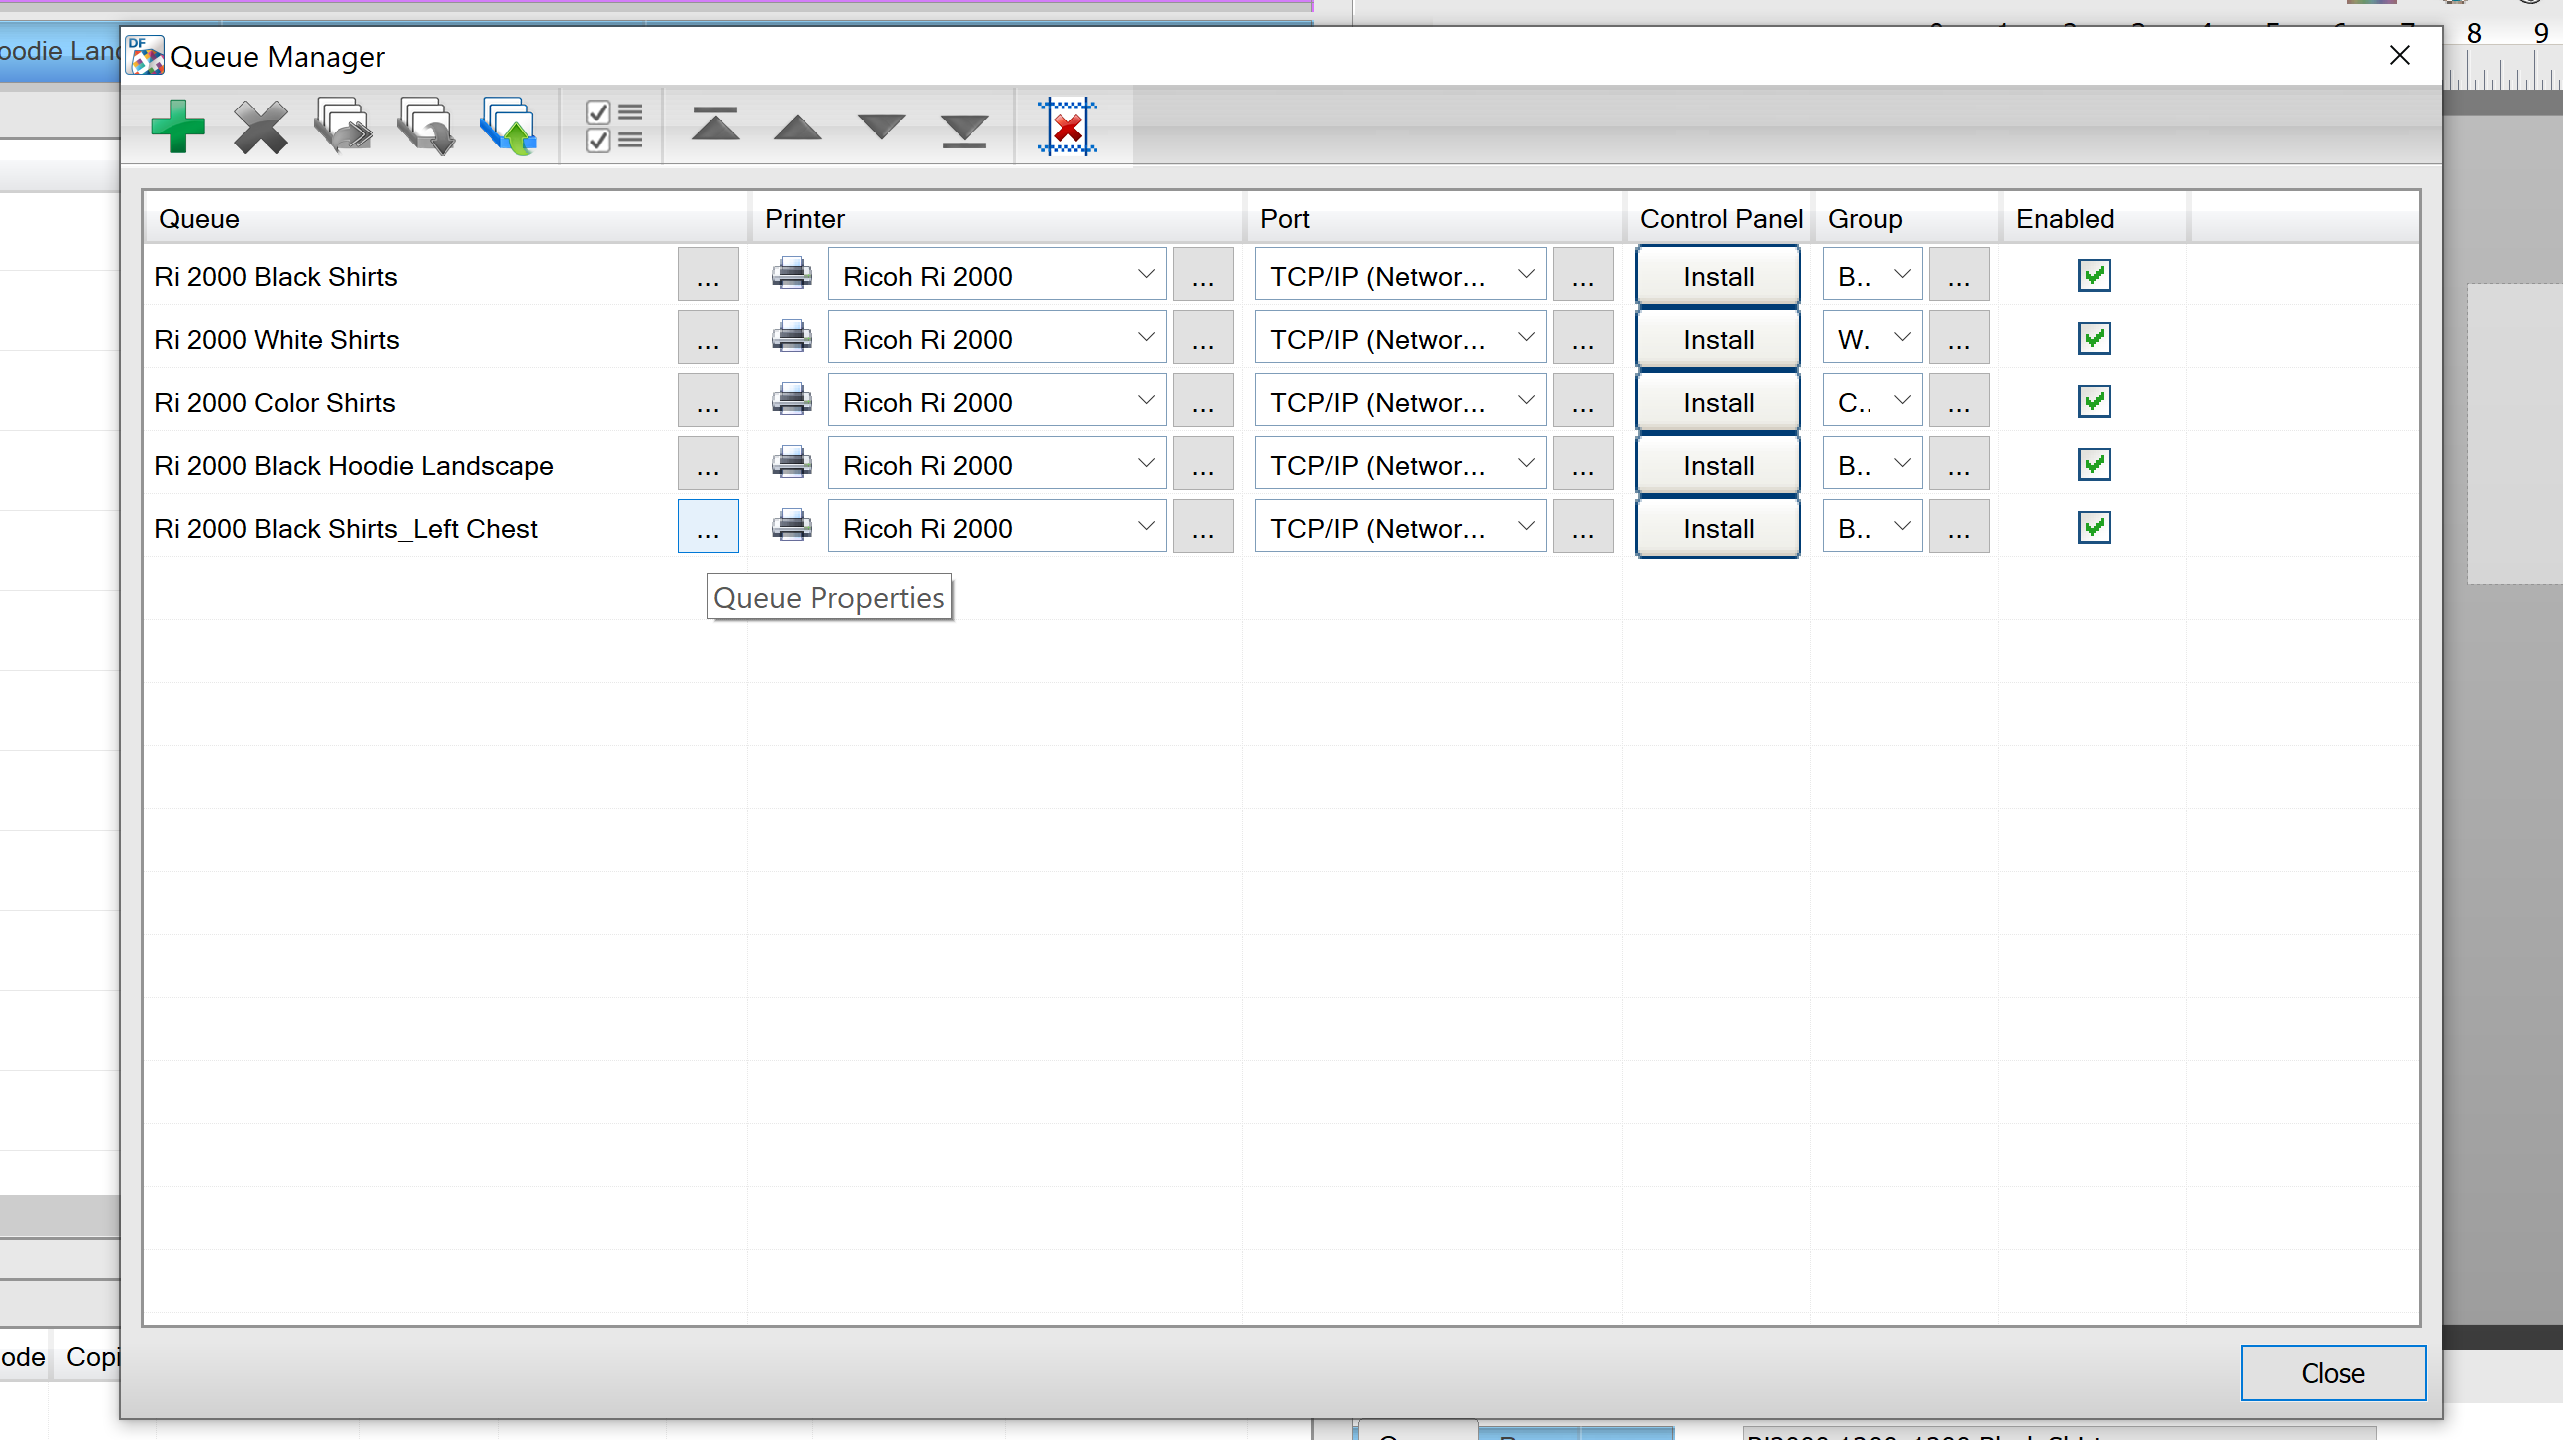
Now you should see the Left Chest queue you created listed in the Queue Manager.
In our example, you will see Ri 2000 Black Shirts Left Chest.
Now. click on the three dots to the right of this queue’s name to open the Queue Properties.
A Queue Manager window should appear that gives you options down the left-hand side.
Click on Settings > Media Setup. Media Setup’s different options should appear on the right-hand side now.
Click on the drop-down menu for Name and select the Medium Left Chest from the list of templates.
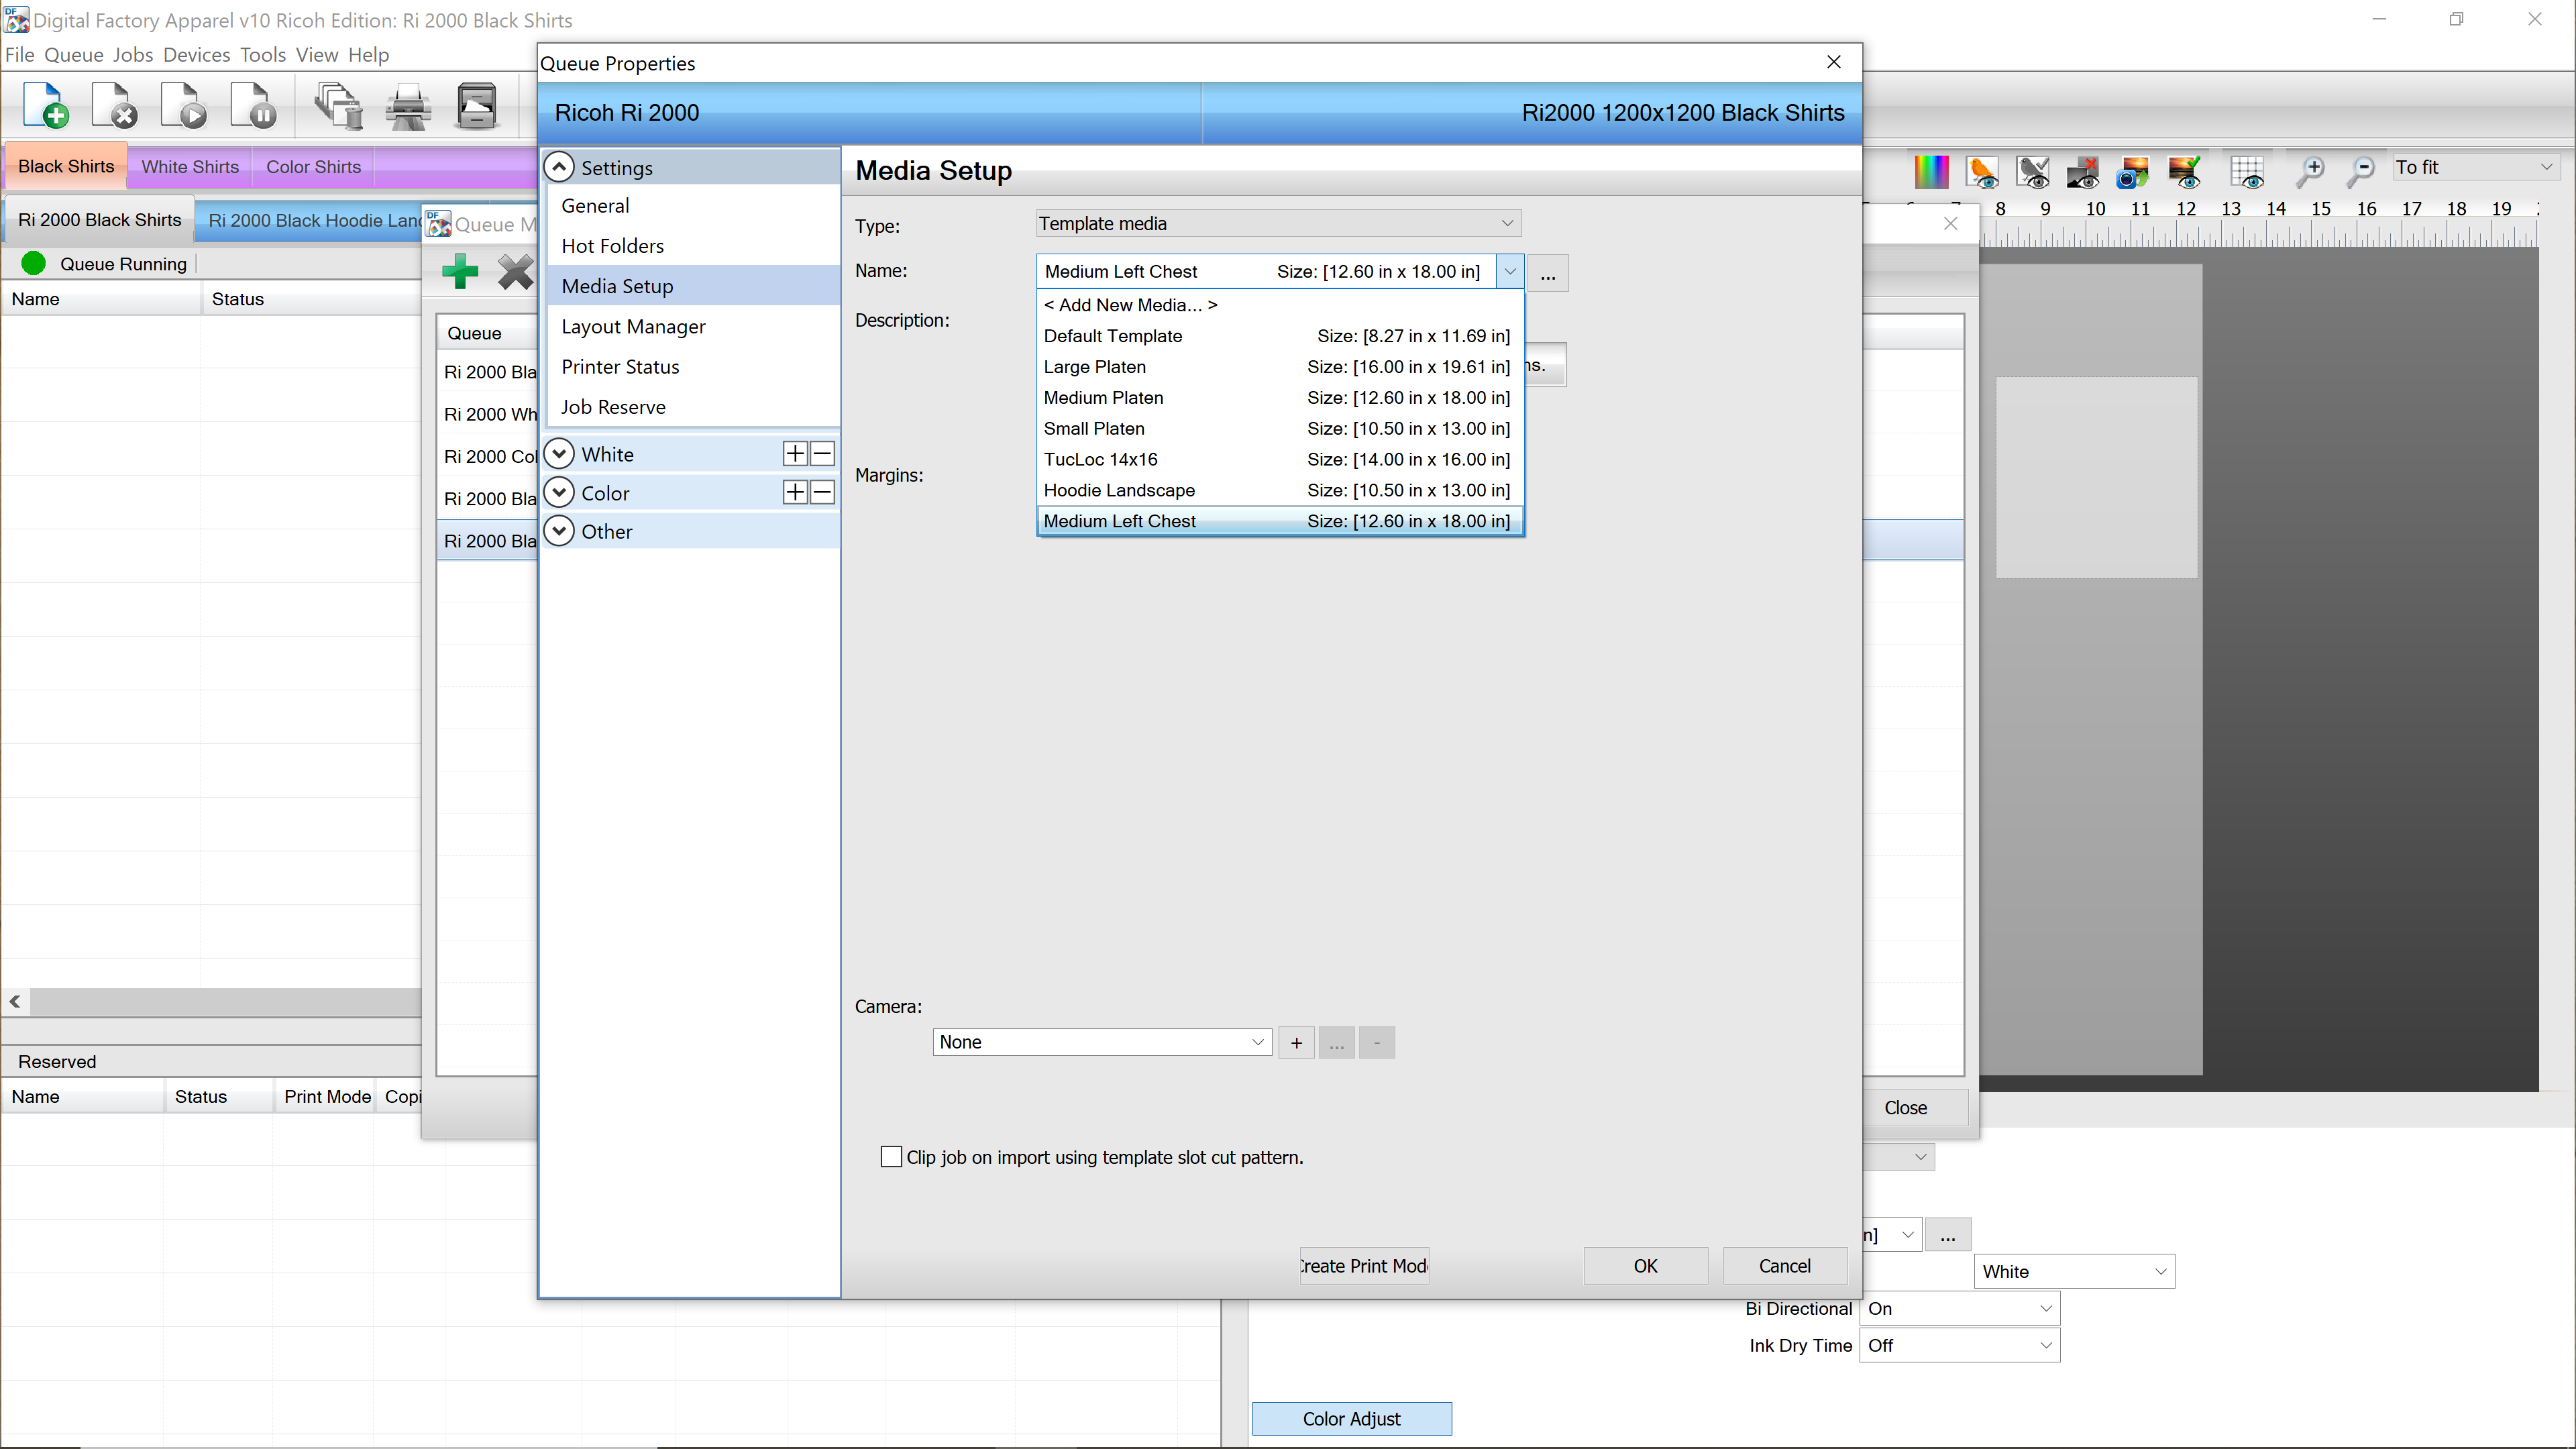
Once you have selected Medium Left Chest from the drop-down menu, click on OK at the bottom of the Media Setup window to confirm this change.
Now, close the Queue Manager and you should see a new Queue for Black Shirt Left Chest.
In our example, you will see Ri 2000 Black Shirt Left Chest. When you click on this queue, you will see the preview window change to show you where the image will load for a left chest print using the medium platen.
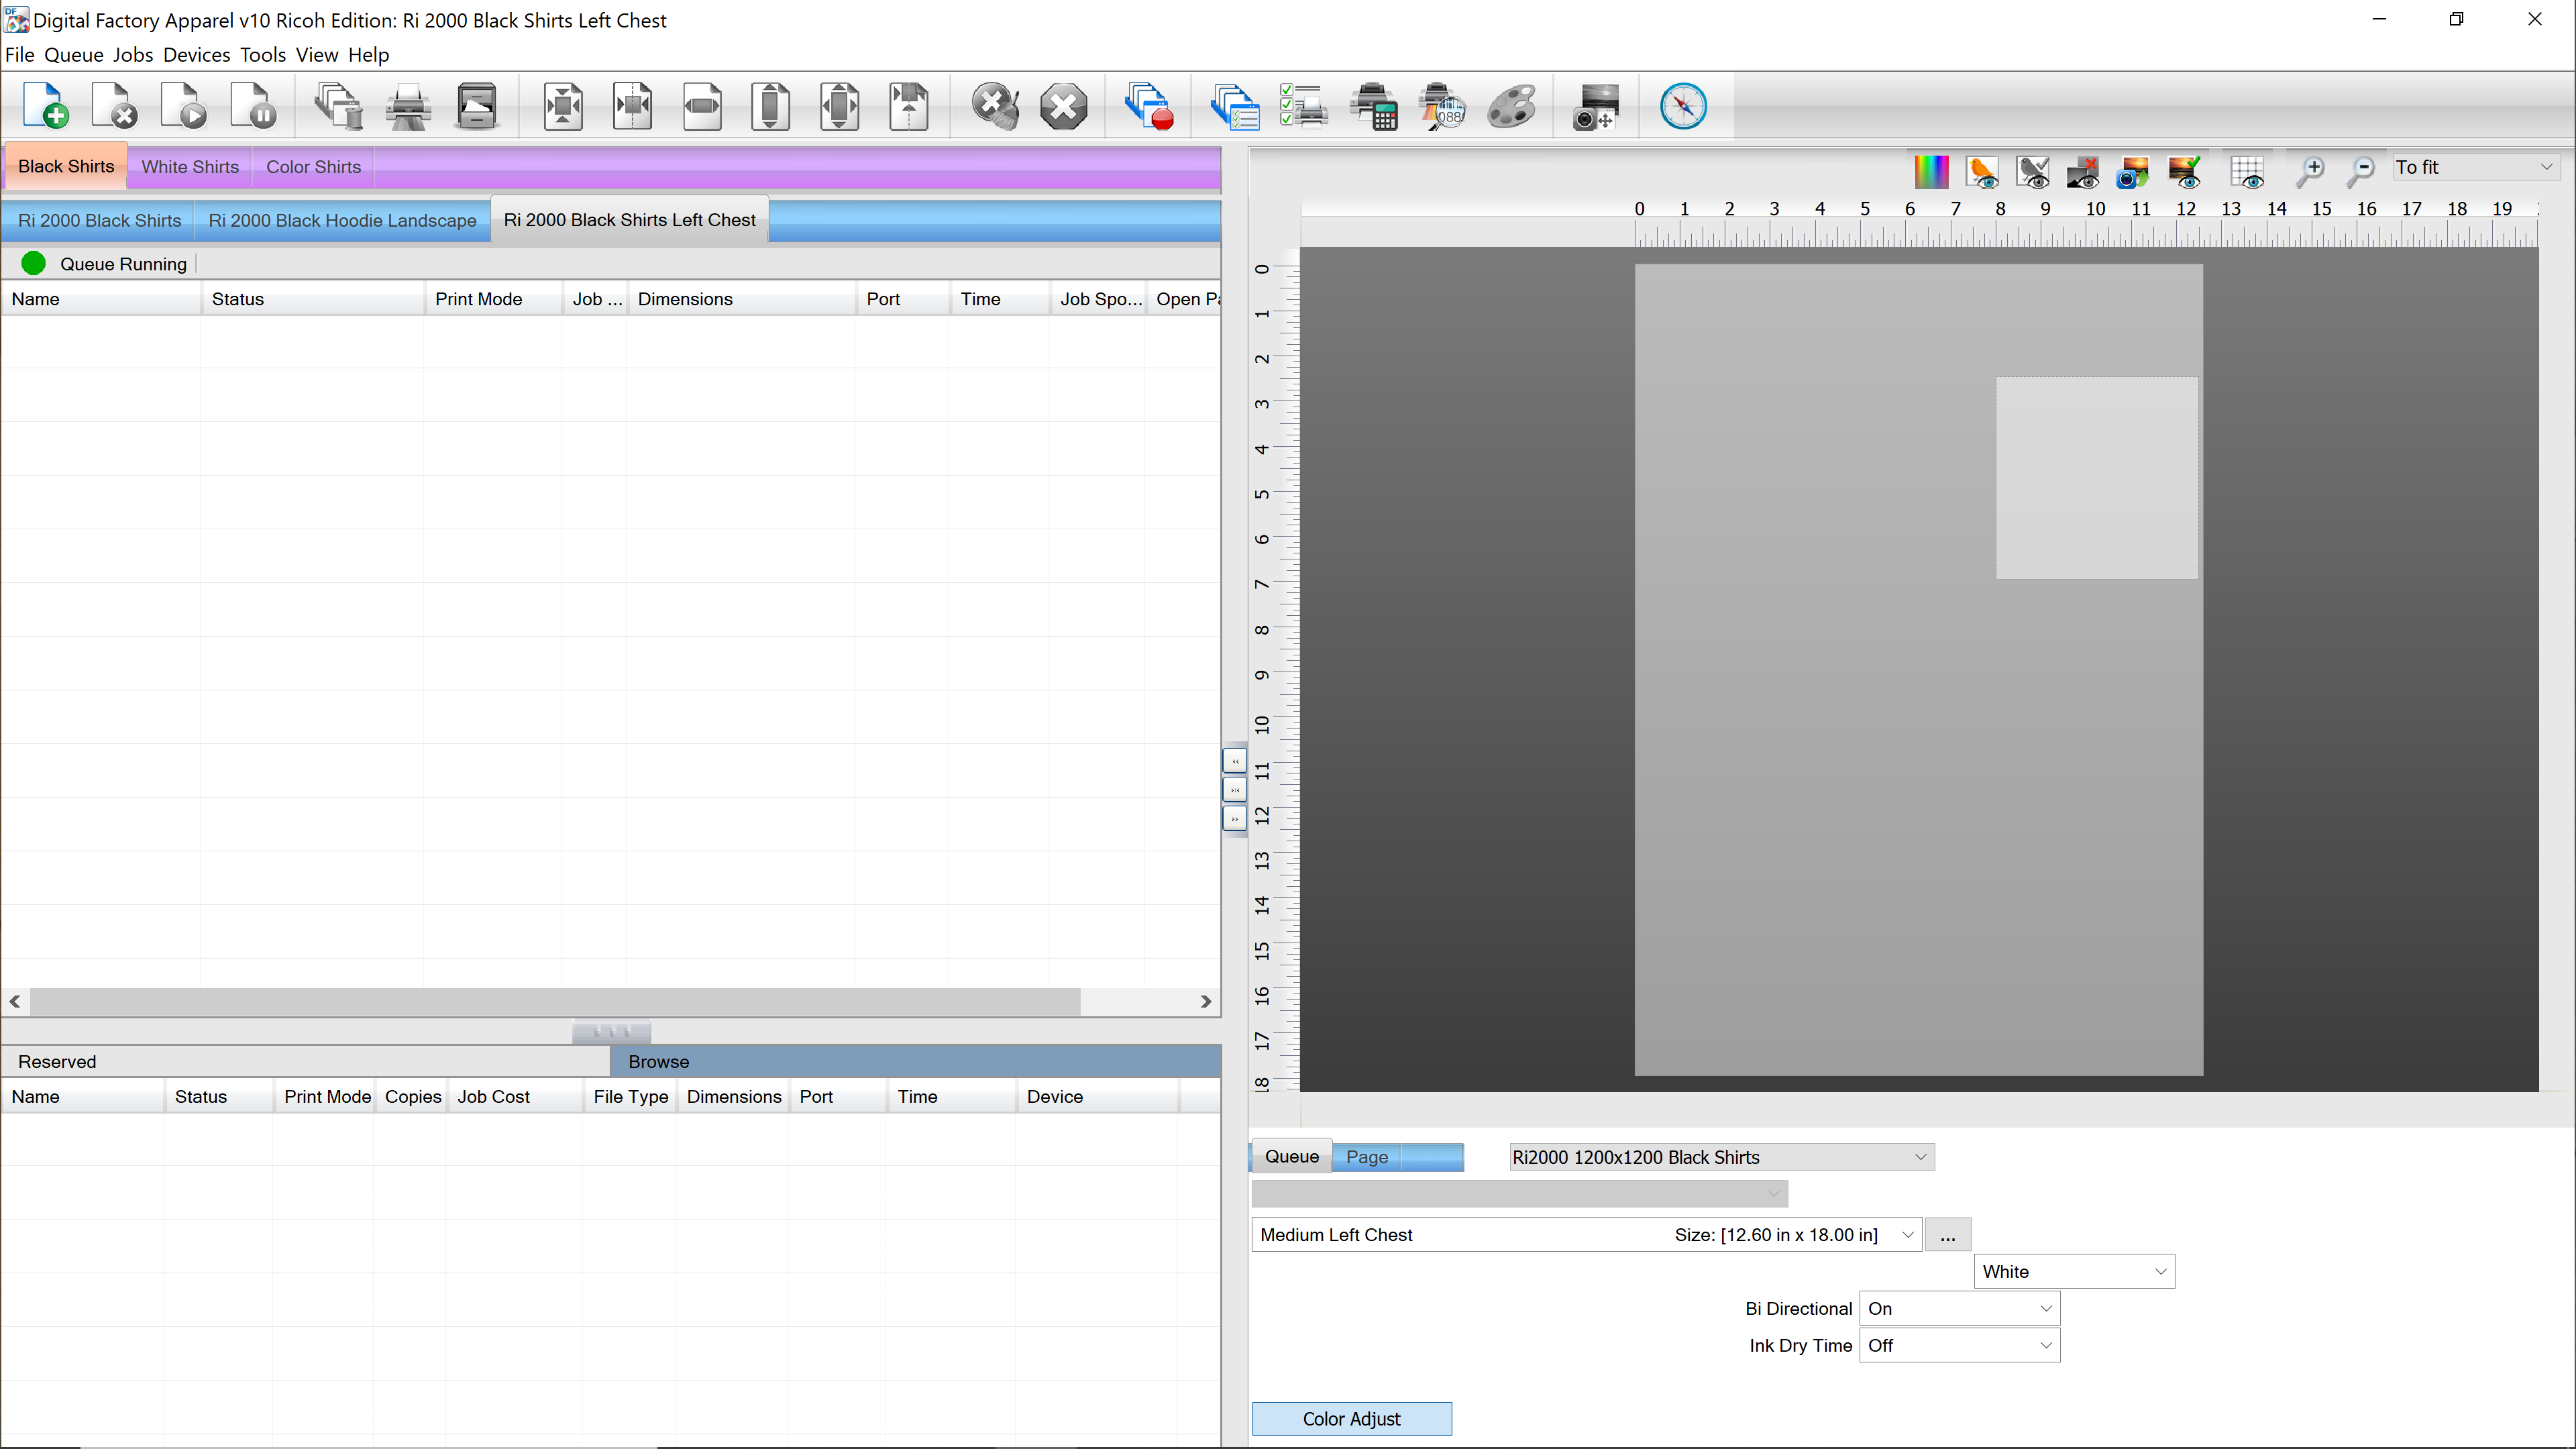
Now you are all setup with a queue that you can drop files into that need a left chest print using the medium platen.
If you have any issues with setting this up or have any further questions about CADlink, contact our support team so we can help you.

